Moreover, once you have obtained root, you could then be in a position to flash numerous mods as well. These include the like of Substratum Themes, Xposed Framework, Viper4Android, and Magisk Modules. However, you wouldn’t be able to carry out most of these tweaks unless you have a working custom recovery installed. In this regard, TWRP has always been the go-to choice. Not only does it beholds all the important feature sets, but it also gets updated frequently. This makes sure that the recovery is free from all bugs, its supported device section gets further expanded, and also translates to the fact that you might get a chance to welcome some new features to the fore as well. And all this is the case this time around, with the release of the latest version of this custom recovery. So in this guide, we will be listing out all the new features of TWRP 3.6.0 and then make you aware of the steps to install this recovery. Follow along.
New Devices Added in TWRP v3.6.0
The biggest takeaway is that TWRP 3.6 is now fully compatible with devices that came with Android 11 out of the box. As a result, many more devices will now fall under its supported device list. Here’s the list of all those devices:
New Method to Install TWRP to Boot Partition
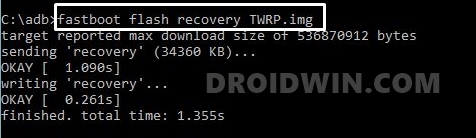
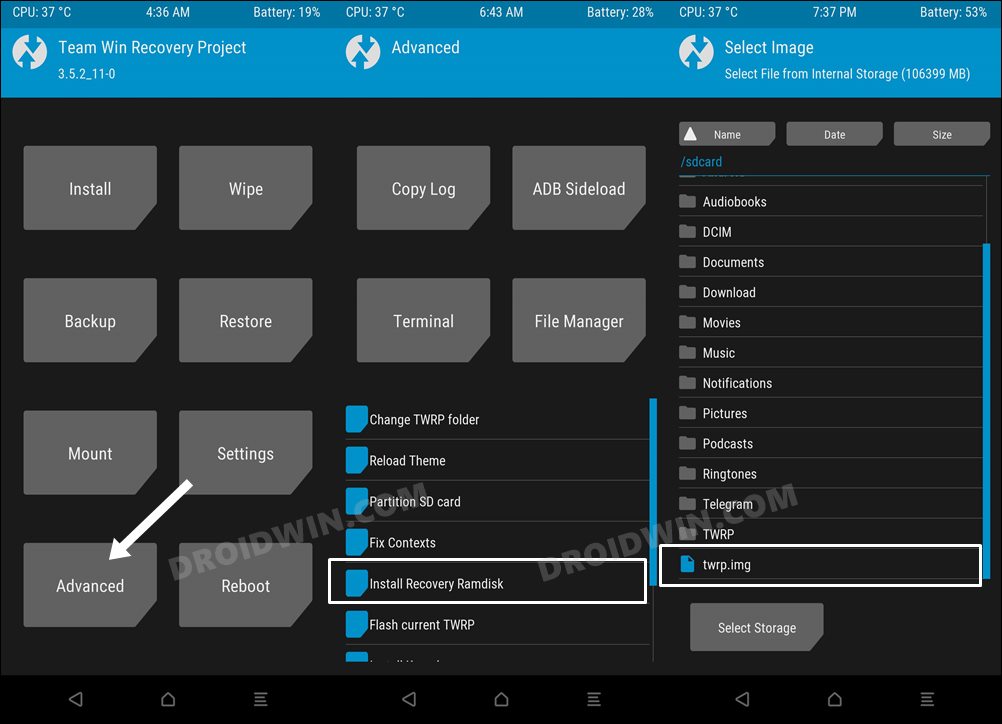
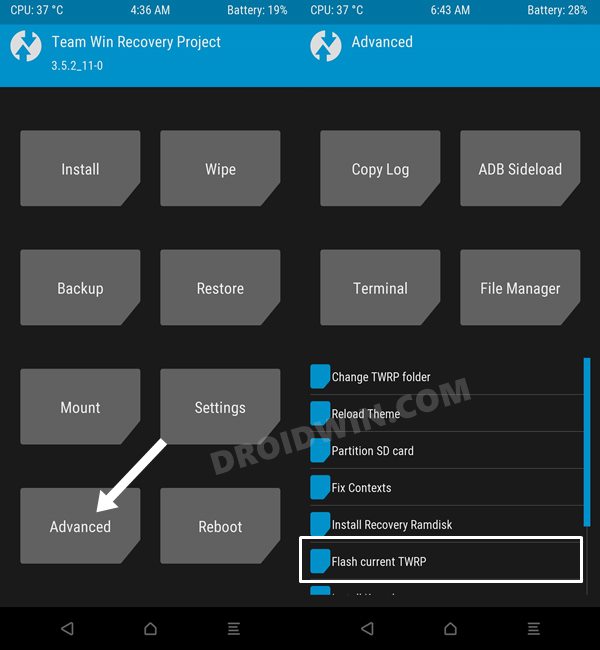
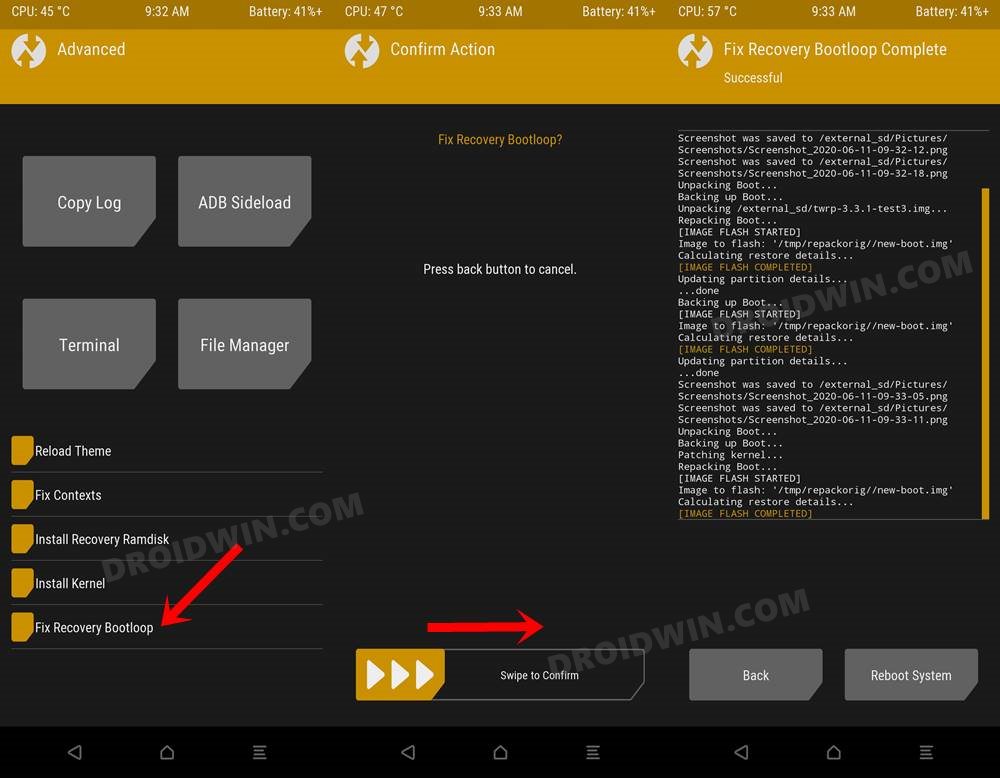
If your device has a recovery partition, then you could directly flash to that partition via the below commandfastboot flash recovery twrp.imgBut if your device has an A/B partition scheme, then your device most likely wouldn’t have a recovery partition. You will instead have to take the help of boot partition to temporarily boot your device to TWRP via the below command:fastboot boot twrp.imgOnce it’s booted to TWRP, you will then have to go to Advanced and select the Install from Recovery Ramdisk. After that, you will have to navigate to the twrp.img file and then perform a right swipe to flash it. While this method still stands, there is now a better approach to carry out this task. Instead of using the Install from Recovery Ramdisk option, you could now opt for the Flash Current TWRP option which is also present under TWRP’s Advanced section. Do note that no matter whether you choose the Install Recovery Ramdisk option or the new Flash Current TWRP, you will still have to fix the recovery bootloop. For that, head over to Advanced > Fix Recovery Bootloop > Perform a right swipe to confirm it.
So what is the benefit of this method? Well, you wouldn’t have to manually flash the twrp.img file to permanently install it. Rather as soon as you select the Flash Current TWRP option, it will automatically flash TWRP permanently using the file that you have used to boot to TWRP in the first place.
Complete Changelog
Here’s the complete changelog of the latest TWRP 3.6.0. Out of this, it is the “Add support for installation realme/OPPO OTA” that has caught my attention. So this means that we might no longer have to carry out those lengthy instructions steps to install OTA on a rooted device. I don’t currently have an Oppo or Realme device to out this feature, but once I get hold of the same, I will definitely document the instructions as well as the user experience with this feature.
Android 9 Branch
FixesSAR Update script name for clarity – CaptainThrowbackFix building toolbox in android-7.1 – CaptainThrowbackFix bash – Jarl-Penguin
Android 11 Branch
Add support for installation realme/OPPO OTA – Ctapchukupdate custom makefiles to golang modules – bigbiffsepolicy updates – nebrassy, bigbiff, CaptainThrowbackencryption updates for a11 – bigbiff, micky387, CaptainThrowbackvendor kernel module loader – bigbiffvirtual A/B updates – bigbiffsnapshot merges – bigbiffrepacker warnings – CaptainThrowbackf2fs formatting fixes – systemadsymlink dynamic partitions in bootdevice – Mohd FarazFixesFix parsing get_args for wiping cachevendor hal fixes – Mohd Farazfix samsung haptics – soulr344digest check fixes – epicXozip decrypt fixes – CtapchukChange how blank screen works – Sean hoyt
Android 9 and Android 11 Branches
add num template for PIN input – CaptainThrowbackIgnore A12 XML files binary format – zhenyolkaAdd support of A12 keymaster_key_blob files structure – zhenyolkakeymaster restore: warn when pin, password or pattern is enabled – bigbiffNew flashing method for recovery as boot devices:Advanced > flash current twrp – nebrassyfactory wipe and mtp fixes – CaptainThrowbackadd indonesian language – Xdiskupdate Russian language – Ctapchukadd canceldecrypt page – CaptainThrowbackcopy logcat when copying logs in TWRP – CaptainThrowbackFixesFBE Encryption fixes – CaptainThrowbackrepacker fixes for compression – nebrassyexclusion criteria for Fix Recovery Bootloop – CaptainThrowbackunmount vendor if not available – LinkBoi00theme updates – LinkBoi00
So this was all from this guide regarding the newly released TWRP 3.6.0 and the steps to install them. If you have any queries concerning the aforementioned steps, do let us know in the comments section below. We will get back to you with a solution at the earliest.
How to Fix Magisk Bootloop using TWRP Recovery [2 Methods]Fix TWRP No OS Installed Are you sure you wish to reboot?TWRP Recovery gone after a Reboot: How to FixHow to Flash Stock and Magisk Patched Boot.img via TWRPHow to Fix Soft brick/Bootloop after installing TWRP Recovery
About Chief Editor