In this guide, we will show you the steps to root OnePlus 9, OnePlus 9 Pro, and OnePlus 9R devices via Magisk without using TWRP Recovery. The company has recently added three new devices to its feature-rich arsenal. It is no hidden secret that they are sure to follow the tradition of being among the most active players in custom development. In this regard, there are a plethora of mods and customizations that you could welcome onto your devices. All that is needed is an unlocked bootloader. Once you do so, you will be in a position to flash custom ROMs, install a custom recovery like TWRP or try out mods including the likes of Xposed Framework, Magisk Modules, and Substratum Themes. However, to try out the latter half, you need to gain administrative-level privileges and access to the system partition. In other words, it requires rooting the device via Magisk, which could be carried out via two different methods. The first one is directly flashing the Magisk ZIP via TWRP (Magisk ZIP is now part of the Magisk App, beginning with v22). However, custom recovery isn’t yet available for this set of devices. So until then, we will proceed with the second method, which involves patching the stock boot.img via Magisk and flashing it via Fastboot Commands. Keeping all these points in mind, let’s start off with the guide to root OnePlus 9, OnePlus 9 Pro, and OnePlus 9R devices via Magisk running Android 12 ColorOS 12.
How to Root OnePlus 9, Pro, 9R Running ColorOS 12 Android 12 via Magisk
The below instructions are listed under separate sections for ease of understanding. Make sure to follow in the exact same sequence as mentioned. Droidwin and its members wouldn’t be held responsible in case of a thermonuclear war, your alarm doesn’t wake you up, or if anything happens to your device and data by performing the below steps.
Install Android SDK
First and foremost, you will have to install the Android SDK Platform Tools on your PC. This is the official ADB and Fastboot binary provided by Google and is the only recommended one. So download it and then extract it to any convenient location on your PC. Doing so will give you the platform-tools folder, which will be used throughout this guide.
Enable USB Debugging and OEM Unlocking
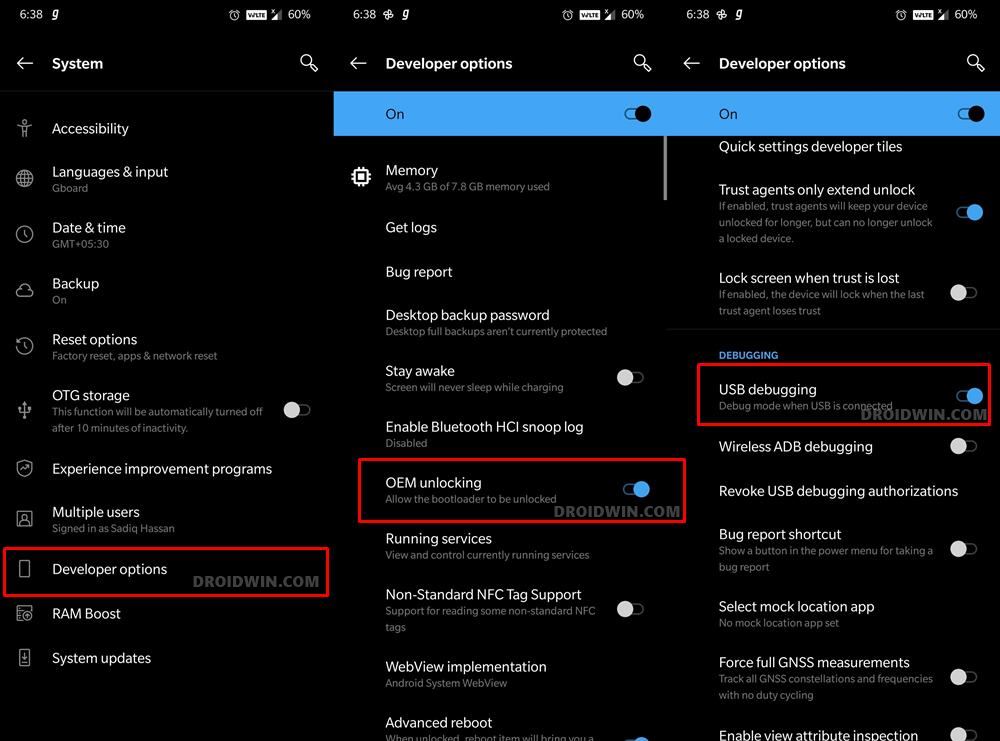
Next up, you will have to enable USB Debugging and OEM Unlocking on your device. The former will make your device recognizable by the PC in ADB mode. This will then allow you to boot your device to Fastboot Mode. On the other hand, OEM Unlocking is required to carry out the bootloader unlocking process.
So head over to Settings > About Phone > Tap on Build Number 7 times > Go back to Settings > System > Advanced > Developer Options > Enable USB Debugging and OEM Unlocking.
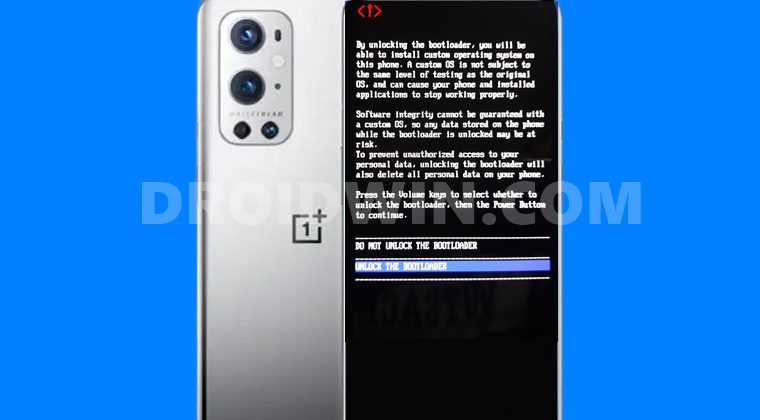
Unlock Bootloader on OnePlus 9, OnePlus 9 Pro, and OnePlus 9R
After this, you will have to unlock the bootloader on your OnePlus device. Do keep in mind that this process will wipe off all the data and might nullify the device’s warranty as well. So if that’s all well and good, then refer to our comprehensive guide to Unlock Bootloader on OnePlus 9, 9 Pro, and 9R. Once done, move over to the next step to root OnePlus 9, OnePlus 9 Pro, and OnePlus 9R devices via Magisk without using TWRP.
Download OnePlus 9 Stock Firmware
Now you will have to get hold of the stock firmware file for your device, from where we would be extracting the stock boot.img file. At the time of writing, the device has received its first OTA for various regions. For my OnePlus 9 (India), the software version is 11.2.1.1.LE25DA, so I would be using its stock boot.img. You should always keep in mind to download the same software version that is currently installed onto your device (which you could check from the About Phone tab). Download: OnePlus 9 (India) 11.2.1.1.LE25DA Stock Boot.img Now coming to the download part, OnePlus hosts all the firmware over to their official site. However, at the time of writing, they are yet to upload the firmware for either of three OnePlus 9 devices. But the developers over at XDA have managed to grab hold of the download link for the update package, so you may download the one that corresponds to your device from the below link. If you are downloading from any other source, make sure to get the Full OTA and not the Incremental OTA.
OnePlus 9
India (11.2.1.1.LE25DA): Full OTAEurope (11.2.1.1.LE25BA): Full OTAGlobal (11.2.1.1.LE25AA): Full OTA
OnePlus 9 Pro
India (11.2.1.1.LE15DA): Full OTAEurope (11.2.1.1.LE15BA): Full OTAGlobal (11.2.1.1.LE15AA): Full OTA
Once you have downloaded the firmware, proceed with the below instructions to extract the boot.img and root OnePlus 9, OnePlus 9 Pro, and OnePlus 9R devices via Magisk without using TWRP.
Extract OnePlus 9/9 Pro/9R Boot.img File from Firmware
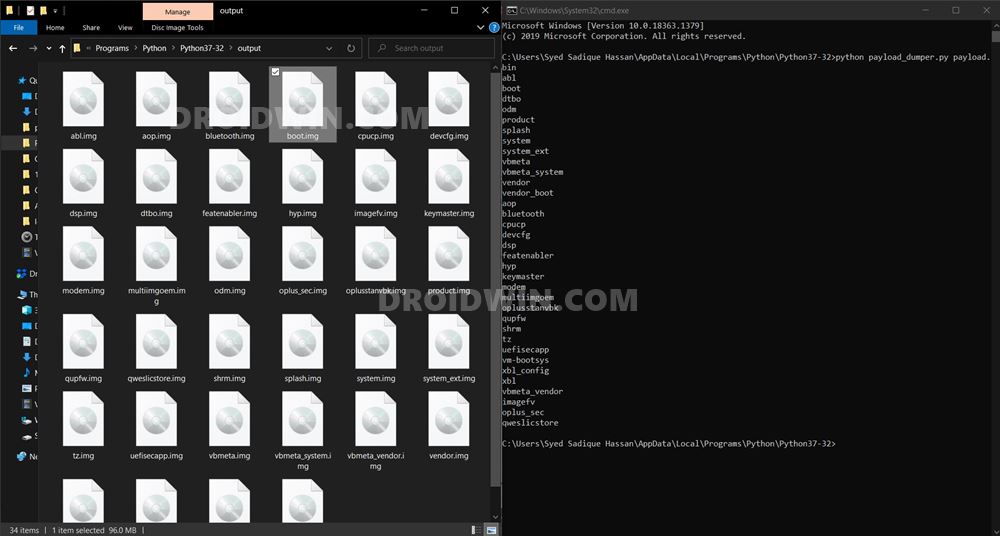
While OnePlus packs its firmware files under the ZIP package, but all its partition files are part of the payload.bin. Hence our aim is to extract this payload.bin file and get the resultant boot.img file. For that, you may refer to our comprehensive guide to How to Extract Stock Boot.img from OnePlus OxygenOS Stock ROM. Once extracted, transfer this boot.img file to your device.
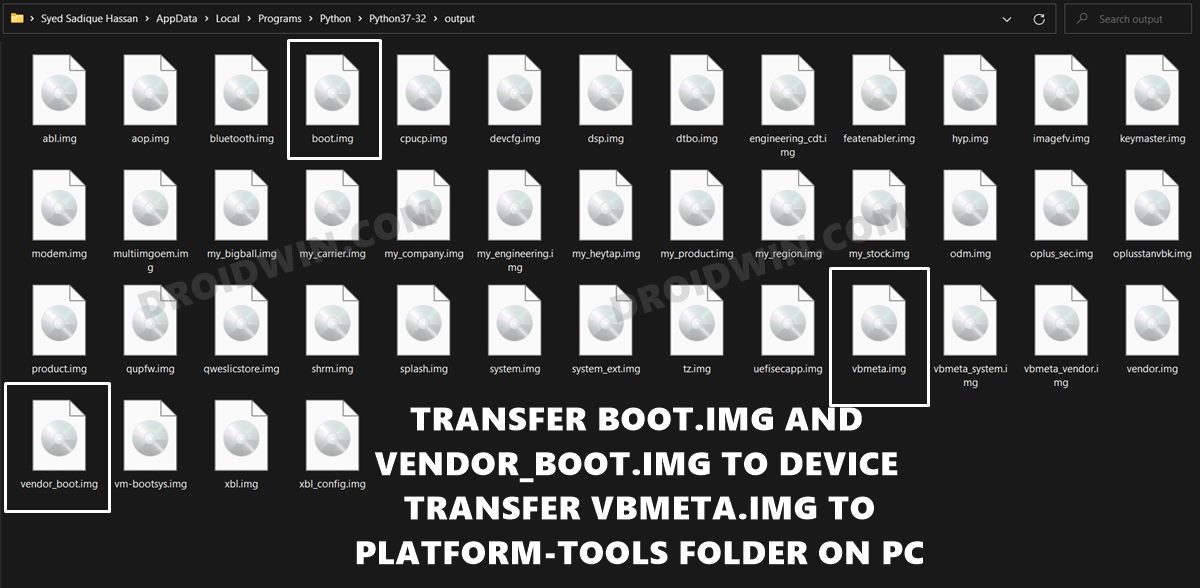
Extract Vbmeta and Vendor_Boot
Beginning with Android 12 ColorOS, you will also need to get hold of the vbmeta.img and vendor_boot.img files, apart from the usual boot.img file that we use. So copy both those files from the extracted firmware and then transfer the vendor_boot to your device and the vbmeta.img to the platform-tools folder on your PC.
Hence as of now, the boot.img and vendor_boot.img should be placed in your device’s internal storage and the vbmeta. img inside the platform-tools folder on your PC. If that’s well and good, then let’s proceed ahead with the steps to root OnePlus 9/Pro/9R running Android 12 ColorOS 12 via Magisk.
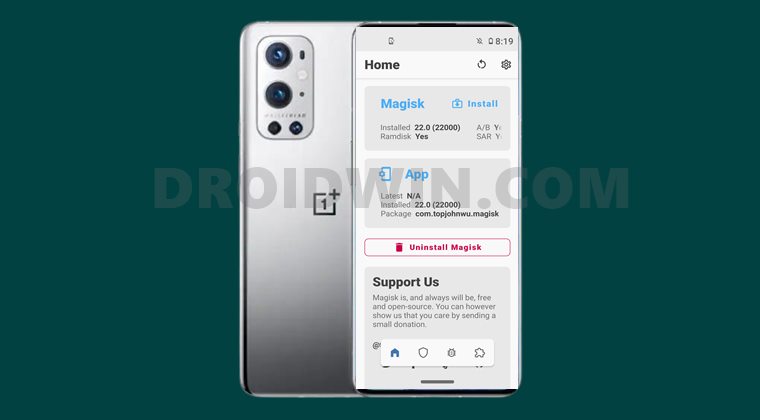
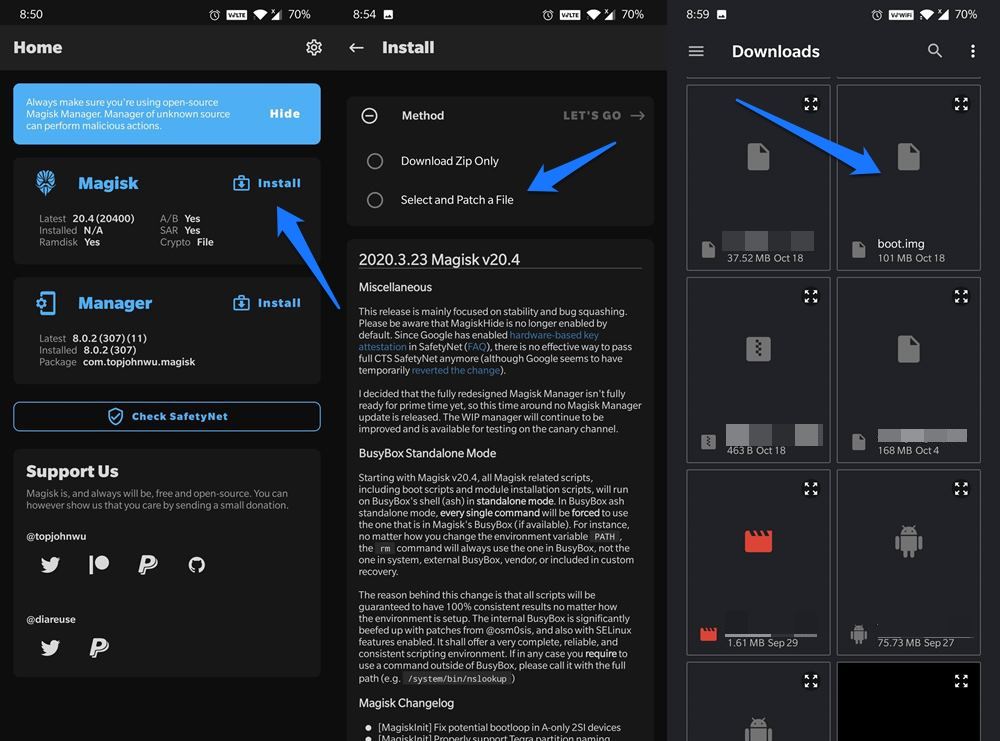
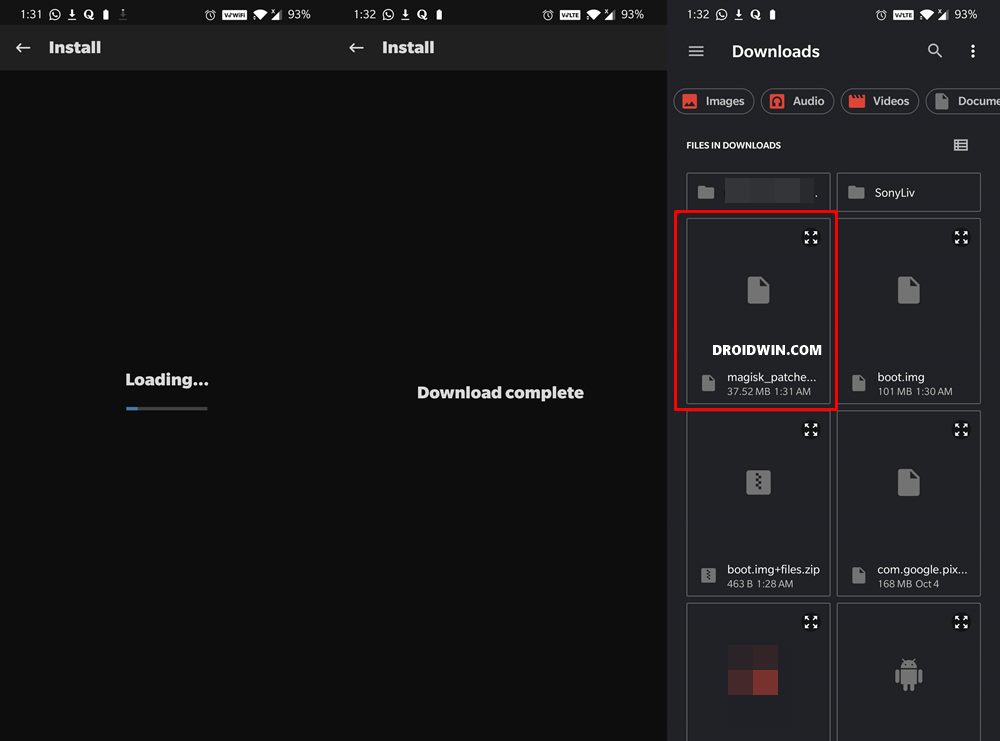
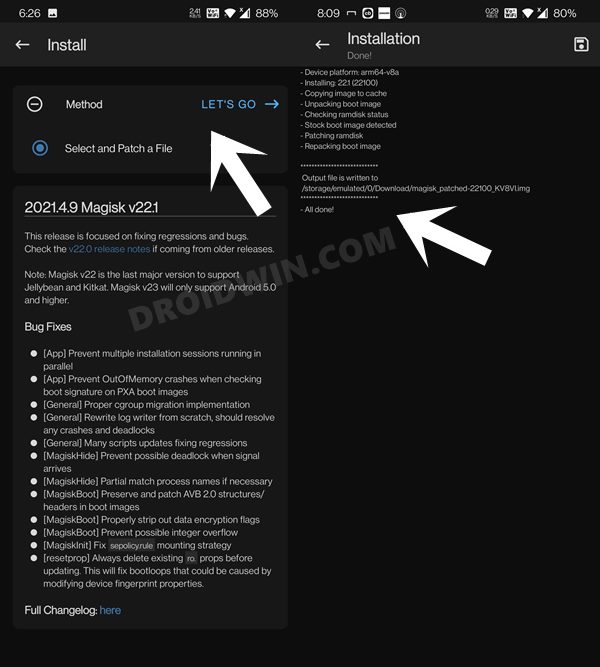
Patch OnePlus 9/Pro/9R Stock Boot.img via Magisk
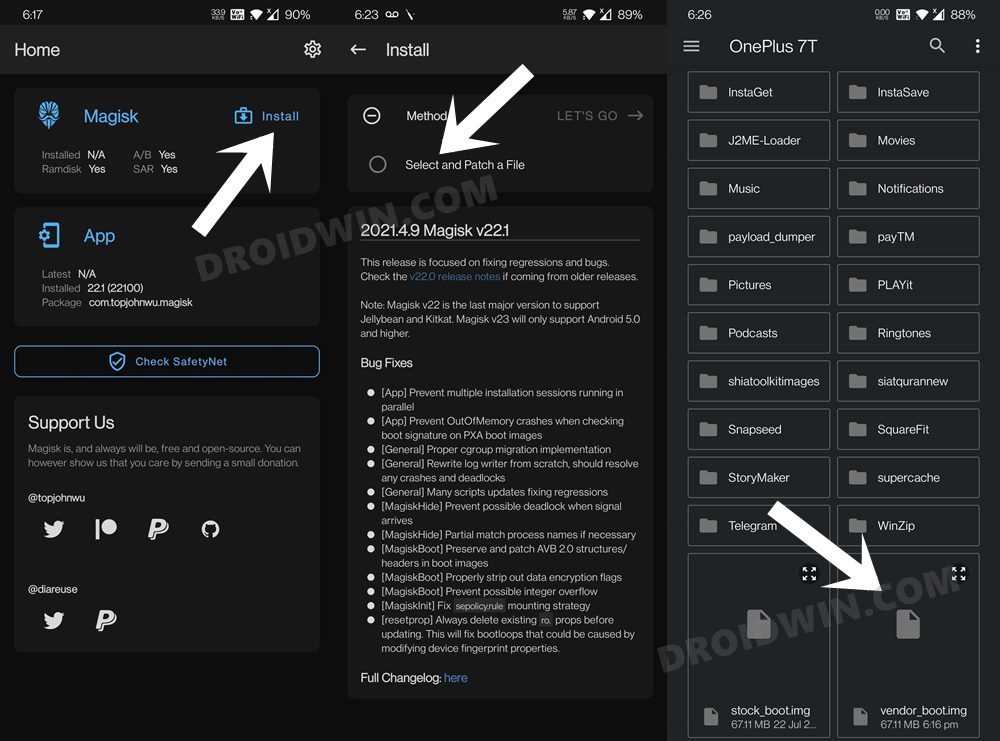
Patch Vendor_Boot via Magisk
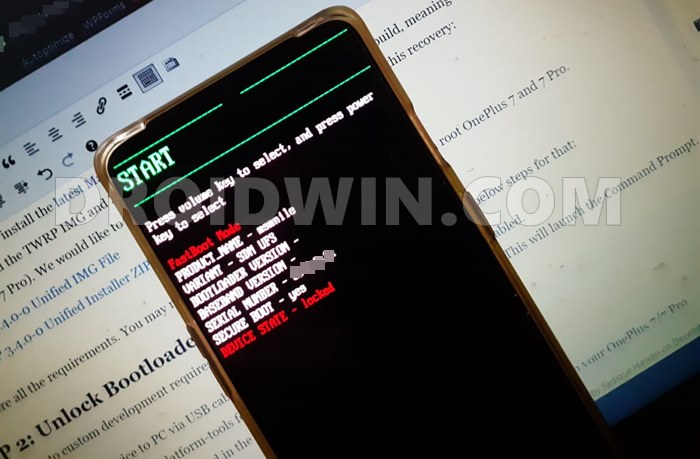
Boot OnePlus 9/OnePlus 9 Pro/OnePlus 9R to Fastboot Mode
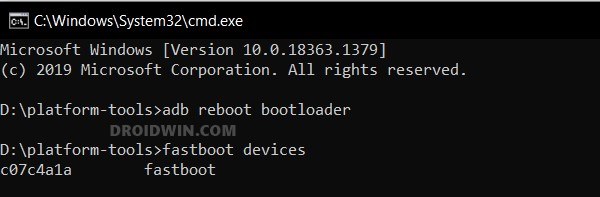
Flash Magisk Patched Boot, Vendor_Boot and Root OnePlus 9/Pro/9R
Let’s now start with the steps to flash the patched files and hence root OnePlus 9, OnePlus 9 Pro, and OnePlus 9R devices running Android 12 ColorOS 12 via Magisk. That’s it. These were the steps to root the OnePlus 9, OnePlus 9 Pro, and OnePlus 9R via Magisk running Android 12 ColorOS 12. If you have any queries concerning the aforementioned steps, do let us know in the comments. We will get back to you with a solution at the earliest.
OnePlus 9/Pro Android 12 Stable or Open Beta 3: It’s all messed up!How to Install OTA Updates in Rooted Android DeviceHow to Pass SafetyNet on Rooted Android 12Remove Navigation Bar Gesture Pill on Android 12 Without Root
Some users were able to root their devices via another handy method. They did everything as mentioned up to the second last step (i.e patching the boot.img and then booting their device to Fastboot). Well, this has always been an option and it should work for the latest OnePlus devices as well (though I have not personally tested it). Anyways, on that note, we round off this guide on how you could root OnePlus 9, OnePlus 9 Pro, and OnePlus 9R via Magisk without using TWRP Recovery. Do let us know which method you ultimately settled for.
About Chief Editor