If we turn our attention towards custom development, then there are a plethora of tweaks to welcome abode. Among them, it’s the ability to gain administrative access by rooting the device via Magisk that has always been at the top of the priority queue for many. However, it comes with its fair share of downsides as well, the primary among which is the failing of SafetyNet. As a result of which, you wouldn’t be able to use banking and payment apps or try put games like Pokemon Go. Likewise, WideVine L1 Certification will fall to L3 thereby resulting in our inability to stream DRM content [such as Netflix] in Full HD. Fortunately, you could easily rectify most of these “issues” by passing the SafetyNet on your rooted OnePlus 11. And in this guide, we will show you how to do just that. Follow along.
How to Pass SafetyNet on Rooted OnePlus 11
Given below are two different methods to get this job done. The first method is the newer and shorter approach whereas the second method is the older and lengthier one. Go through both of them and try out the one that is in sync with your requirement. Droidwin and its members wouldn’t be held responsible in case of a thermonuclear war, your alarm doesn’t wake you up, or if anything happens to your device and data by performing the below steps.
METHOD 1: Pass SafetyNet without Magisk Hide Props Config [NEW]
The shorter of the two methods, this doesn’t require you to spoof the device’s fingerprint or flash the Magisk Hide Props Config, all thanks to tweaks made by the developer of the Universal SafetyNet Fix Module. So on that note, let’s get started with the steps to pass Safetynet on your rooted OnePlus 11.
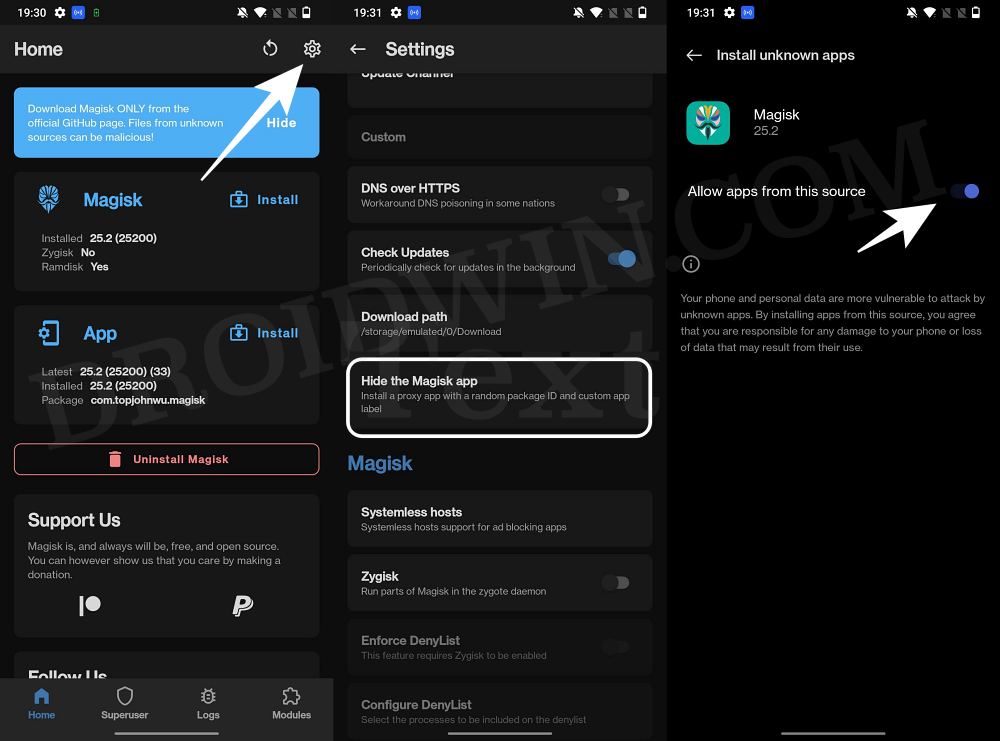
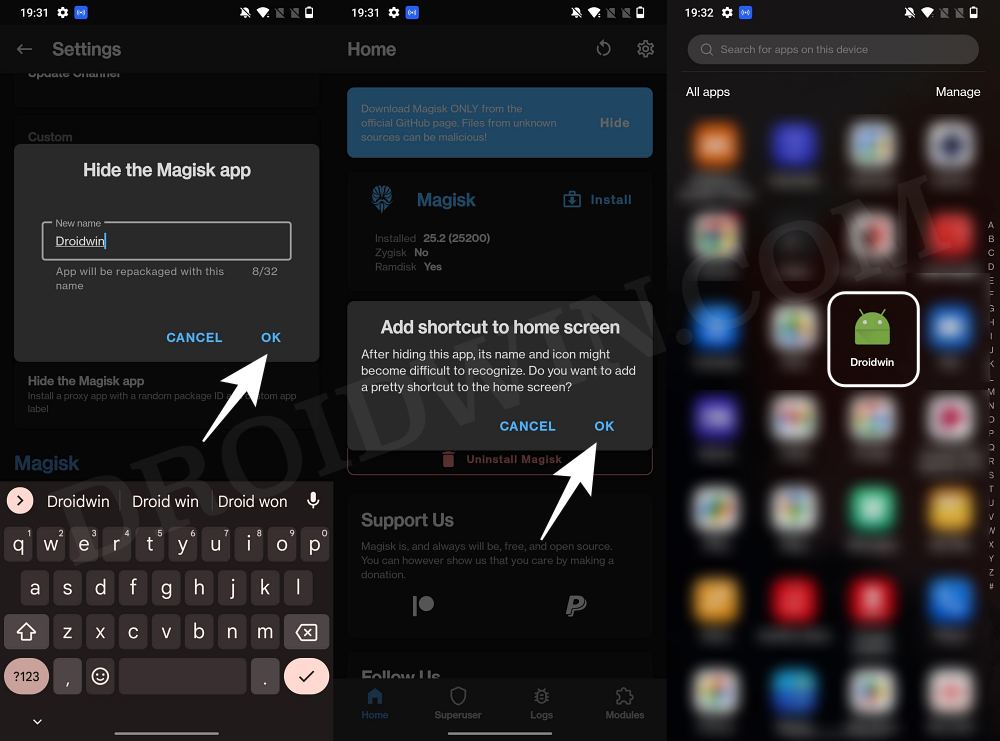
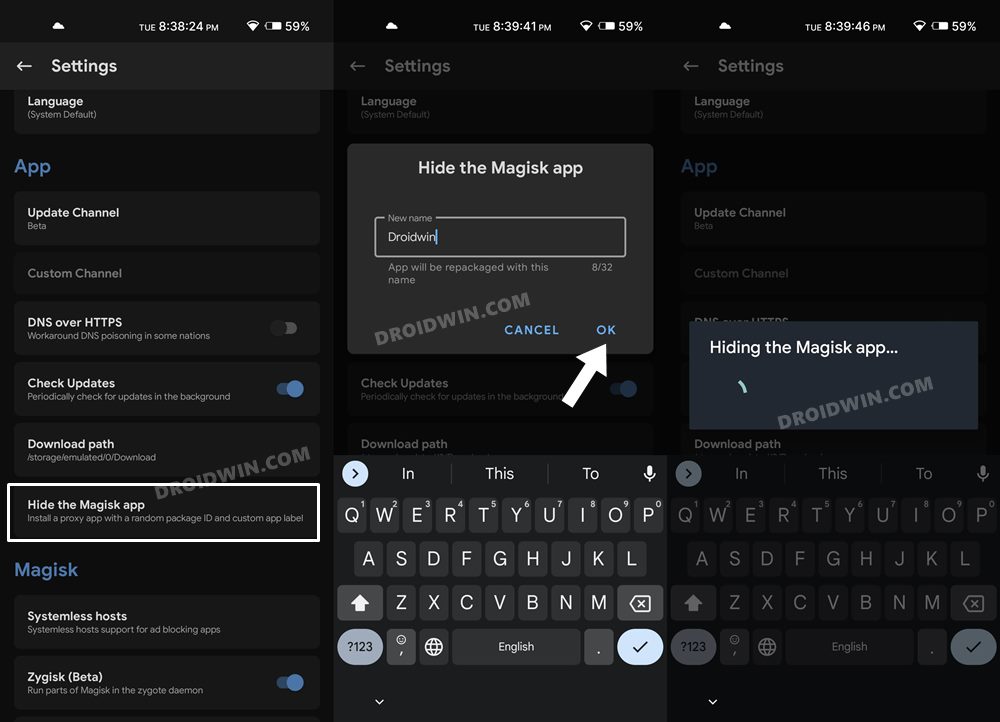
STEP 1: Hide Magisk App
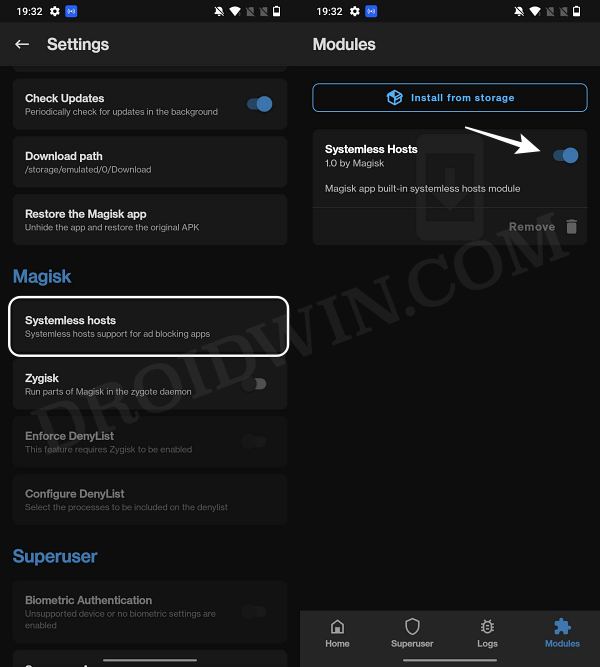
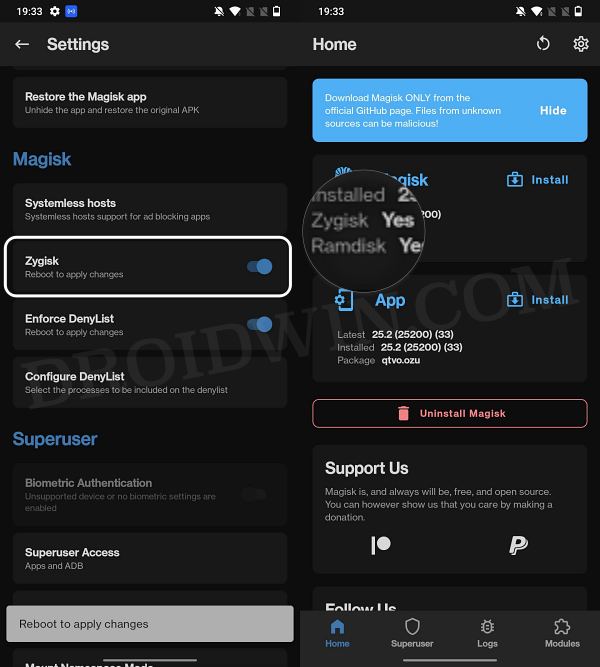
STEP 2: Enable Systemless Hosts
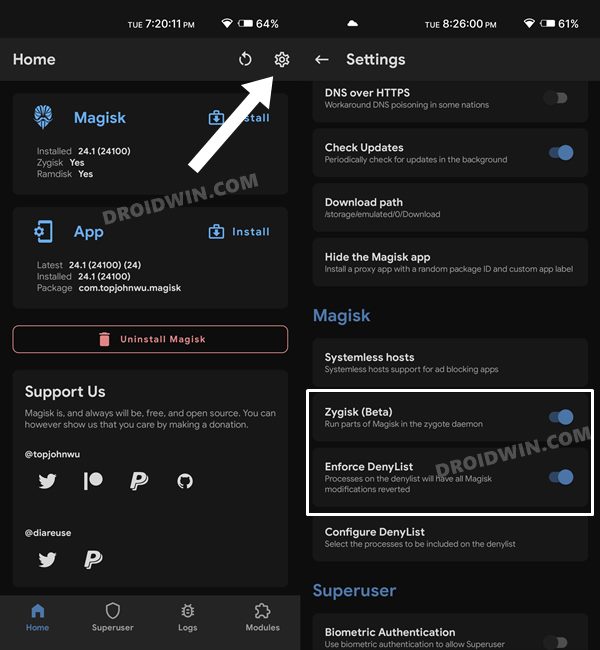
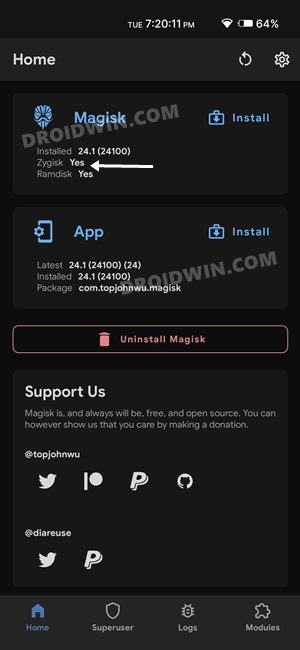
STEP 3: Enable Zygisk
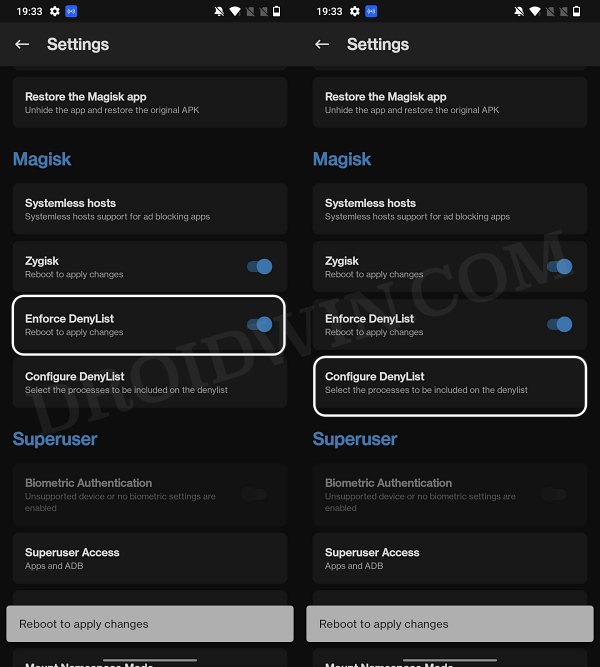
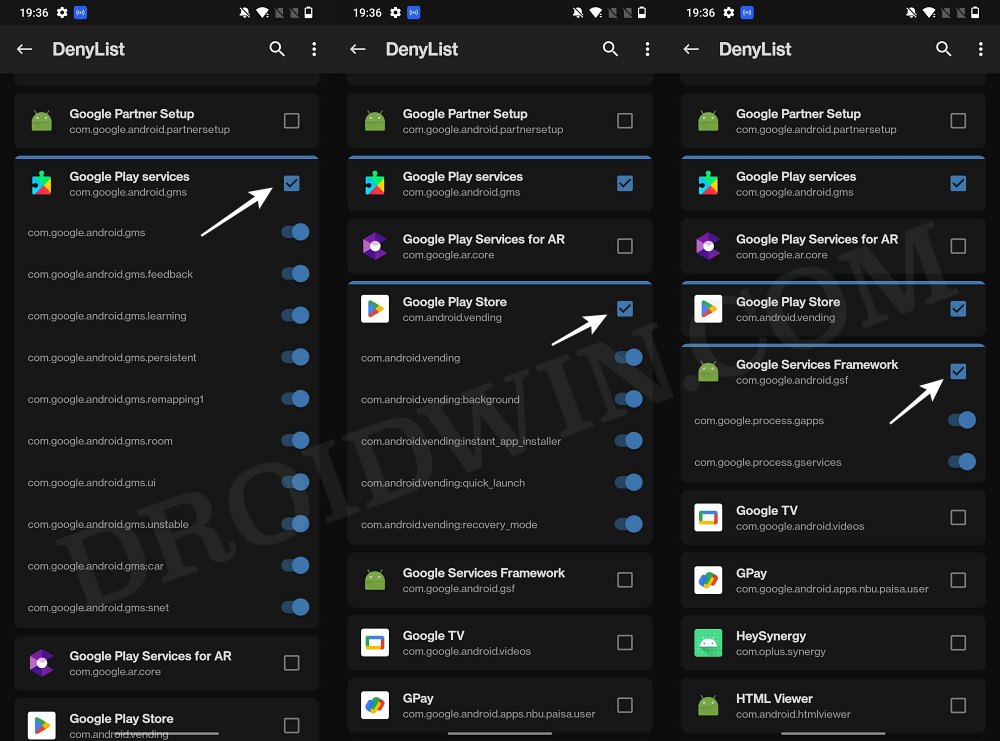
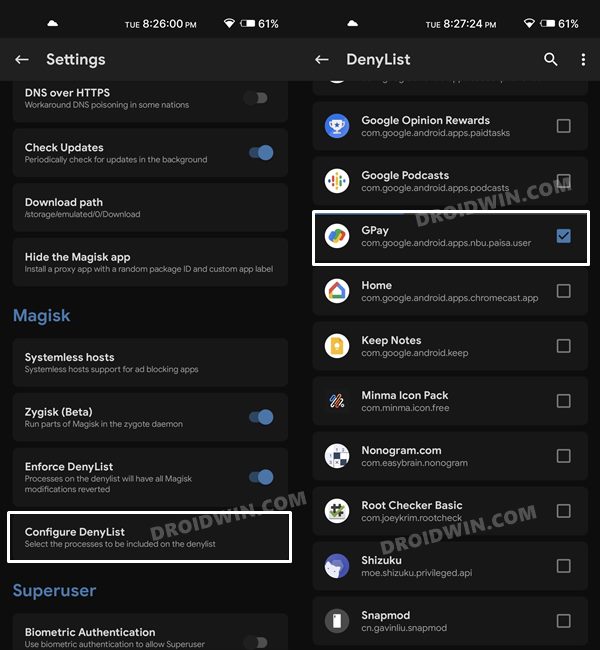
STEP 4: Configure Denylist
Denylist is the new name for the traditional Magisk hide. You could use this functionality to hide root from the desired apps, apart from the three compulsory apps listed below.
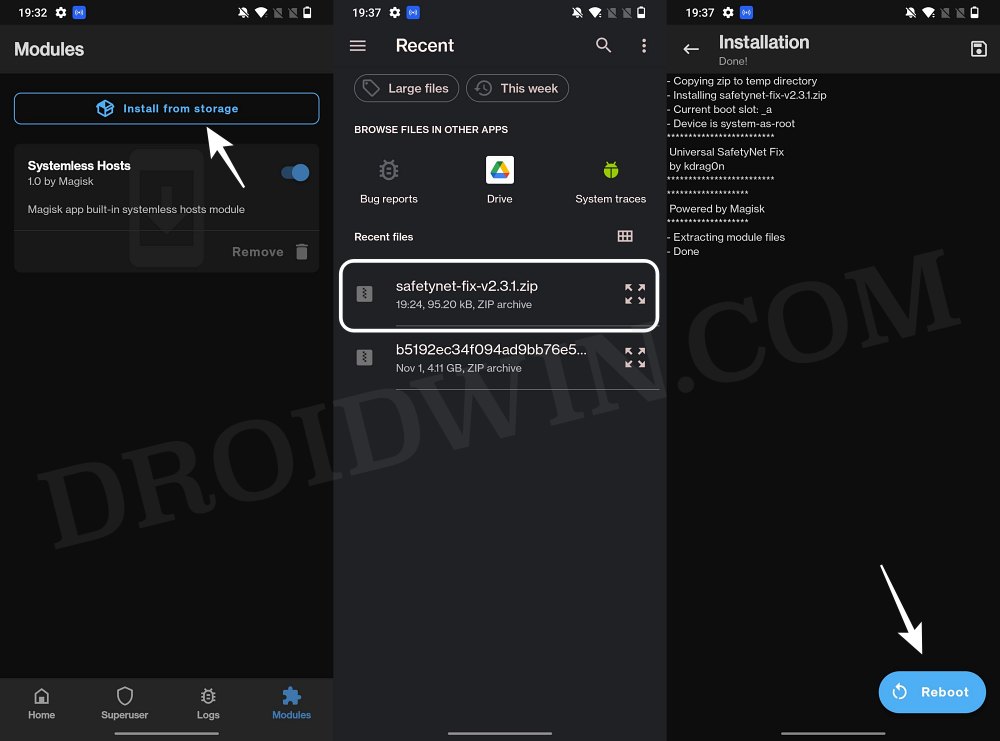
STEP 5: Flash Universal SafetyNet Fix Module
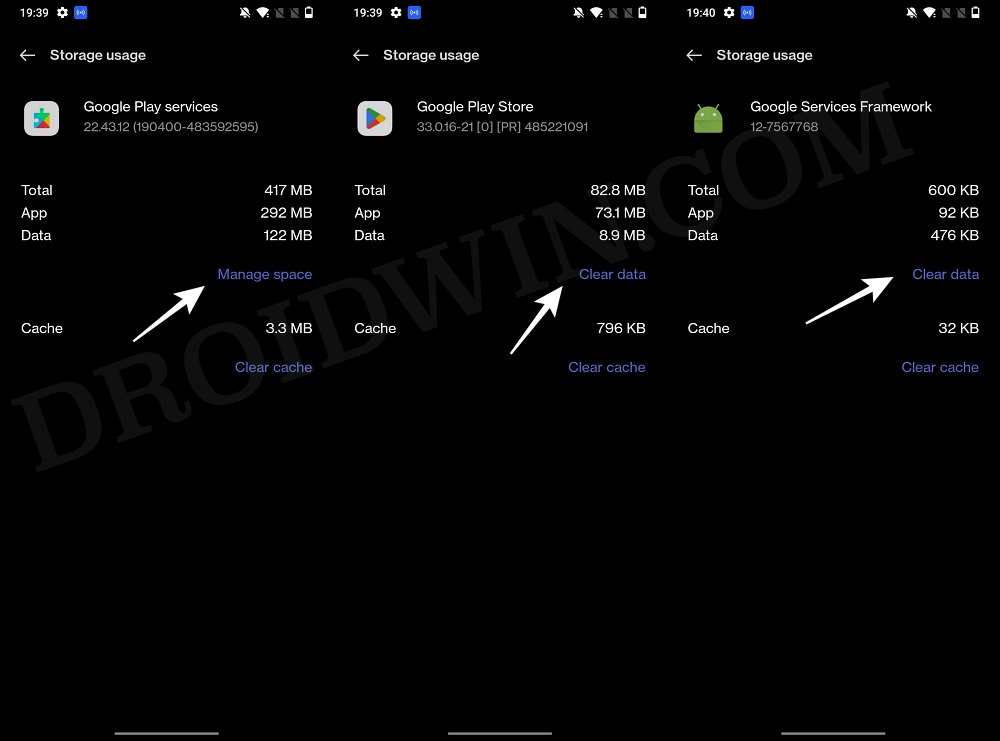
STEP 6: Delete Data
You will now have to delete the app data of all the apps from which you have hidden root. These include the compulsory Google apps and the desired apps of your choice.
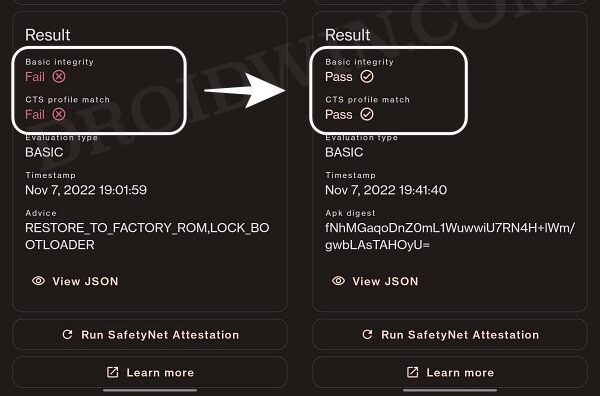
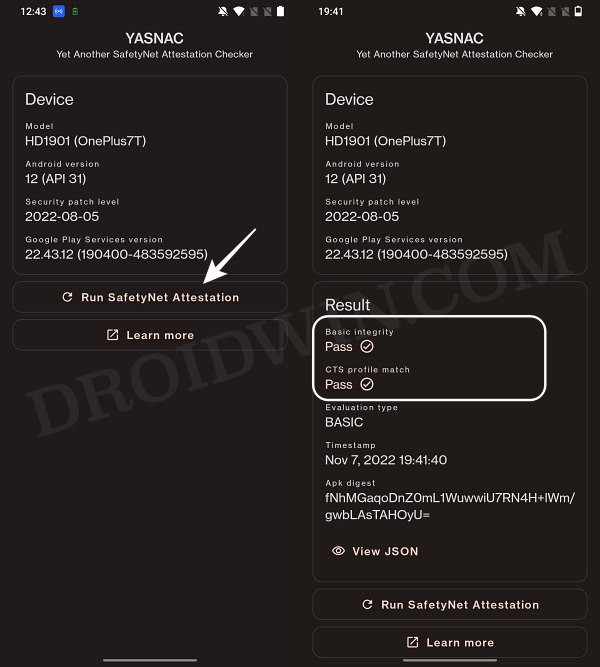
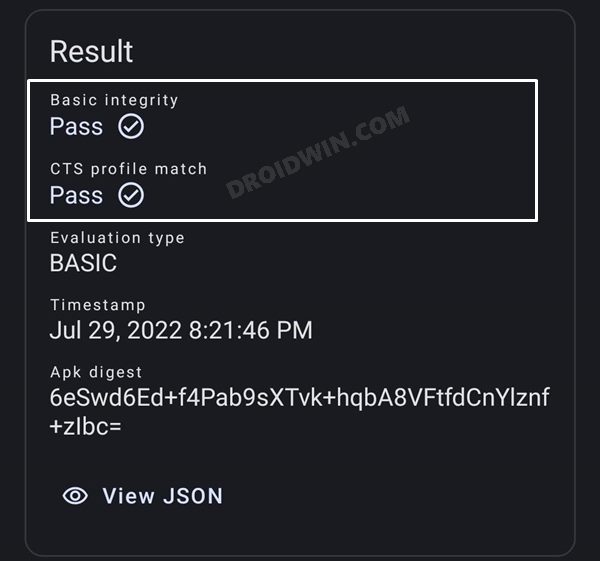
STEP 7: Check SafetyNet Test Results
That’s it. these were the steps to pass SafetyNet on your rooted OnePlus 11. If you have any queries concerning the aforementioned steps, do let us know in the comments. We will get back to you with a solution at the earliest.
How to Pass SafetyNet test after installing Xposed or EdXposedFix Magisk Safetynet API Error: Detailed GuideHow to Fix ctsProfile Mismatch Error on Rooted AndroidBootloop after installing/updating Magisk: How to Fix
METHOD 2: Pass SafetyNet using Magisk Hide Props Config [OLD]
This is the lengthier of the two methods and involves spoofing the device’s fingerprint to one of the older devices that followed Basic Attestation and were easier to bypass.
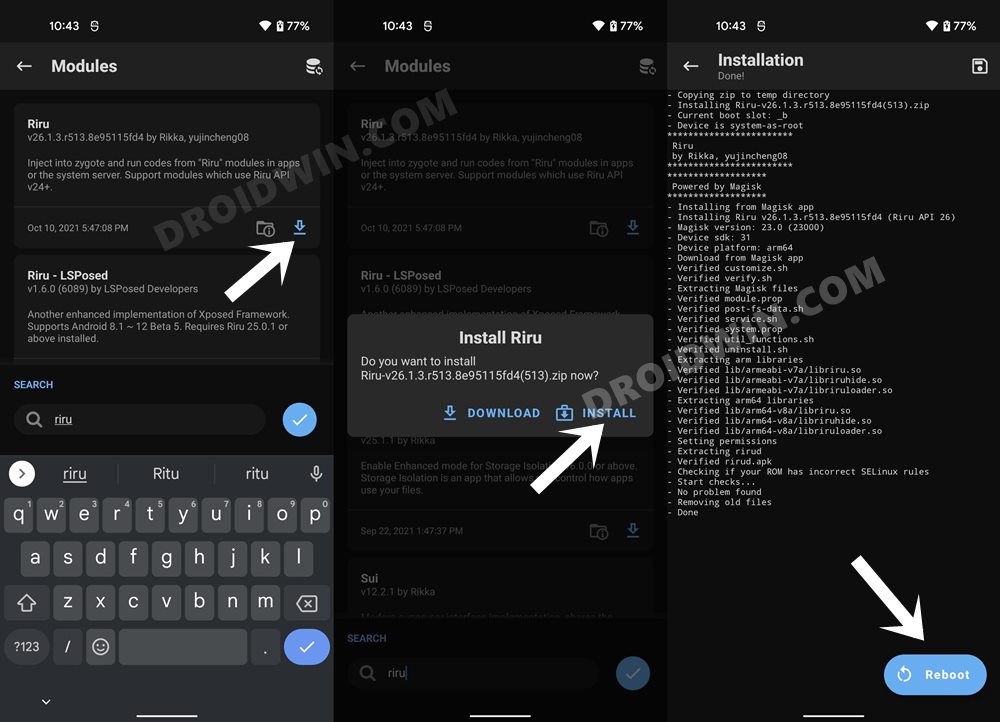
STEP 1: Install Riru Module on OnePlus 11
First off, you will have to install the Riru Module, which is a prerequisite for the SafetyNet Fix Module.
STEP 2: Flash Universal SafetyNet Fix on OnePlus 11
Next up, you will have to flash the latest version of the USNF (Universal SafetyNet Fix) module via Magisk. So refer to the below steps to try it out:
STEP 3: Enforce Deny List and Enable Zygisk on OnePlus 11
Deny List is the new name for Magisk Hide. For the unaware, it is the feature through which you could hide root from various installed apps onto your device. So let’s first enable this Deny List and then configure it according to the requirement.
STEP 4: Configure Deny List on OnePlus 11
Deny List is the new name for Magisk Hide. For the unaware, it is the feature through which you could hide root from various installed apps onto your device. So let’s first enable this Deny List and then configure it according to the requirement.
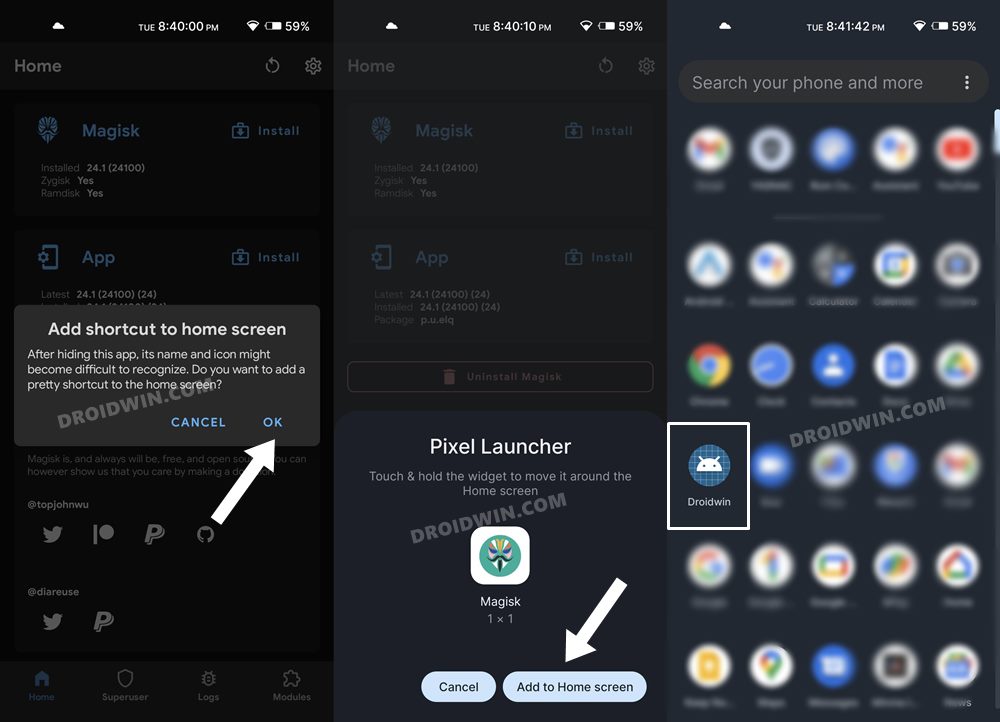
STEP 5: Hide the Magisk App on OnePlus 11
Some apps not only check for the SafetyNet flag but also verify if the Magisk app is installed onto your device or not. Therefore, let’s disguise this app so that it re-installs itself with a different package name. Follow along.
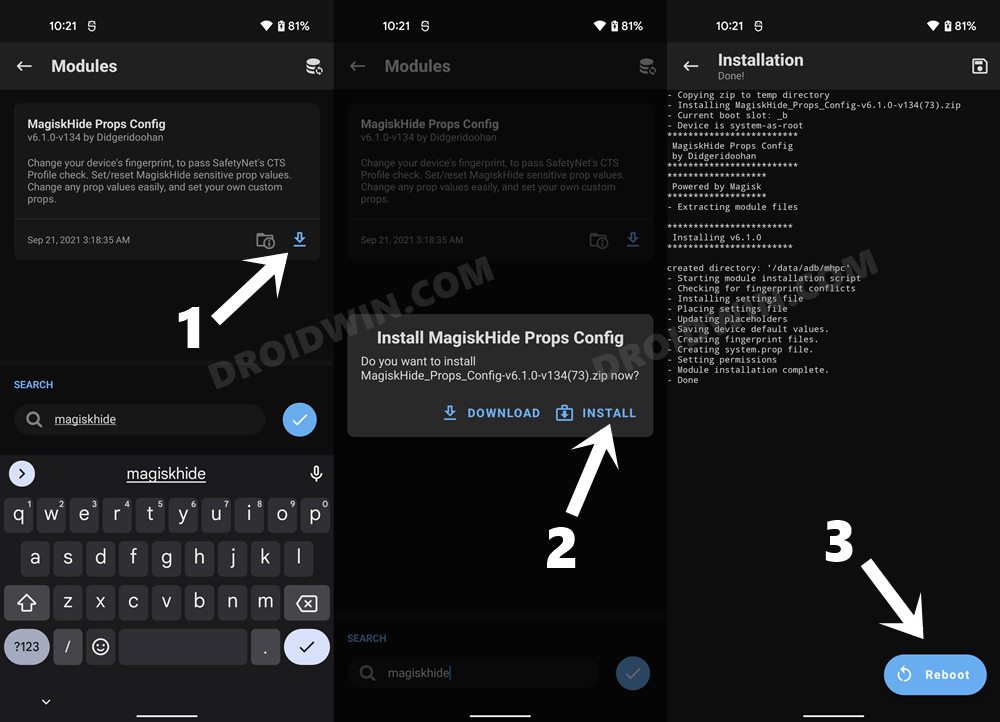
STEP 6: Install MagiskHide Props Config on OnePlus 11
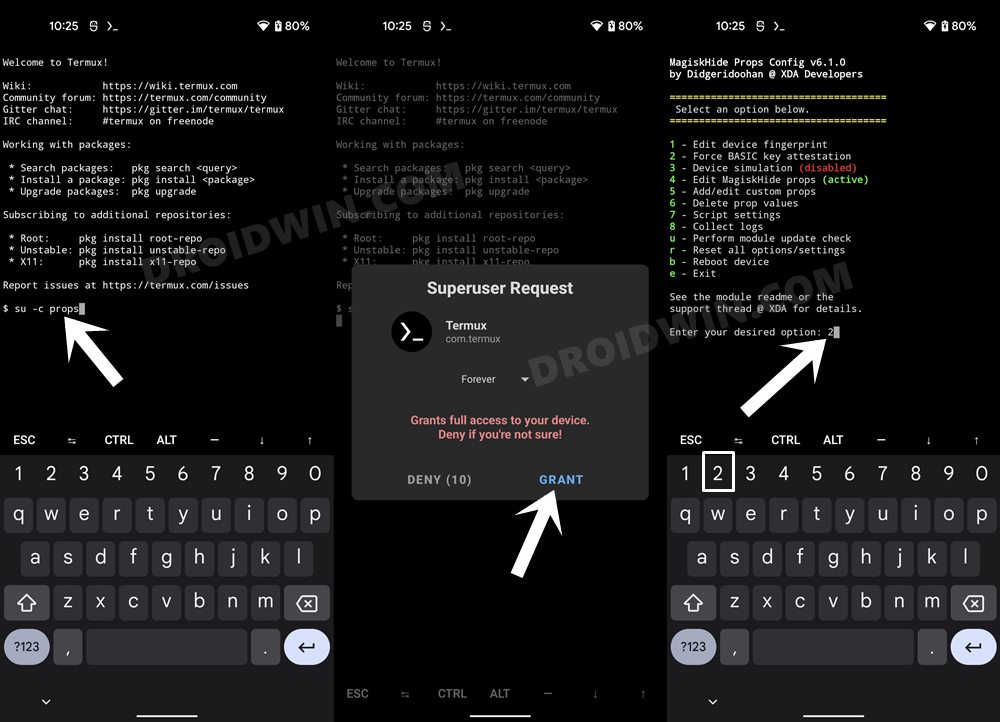
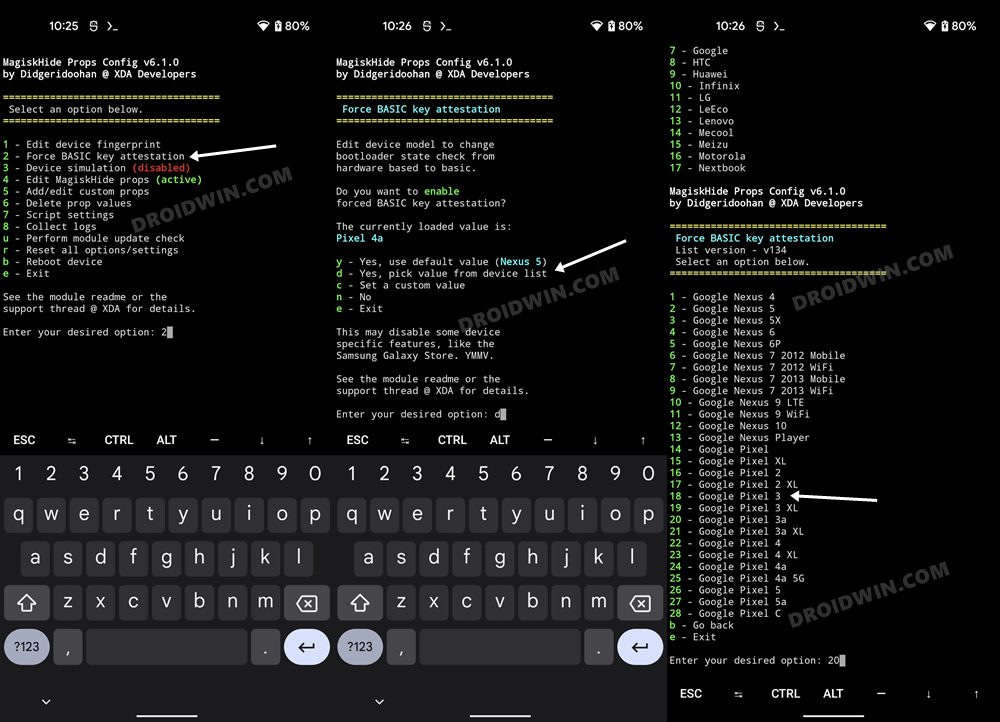
STEP 7: Force Basic Attestation on OnePlus 11
We will now be starting with the implementation of the BASIC attestation on top of the hardware-based so that it becomes easier to bypass. Here’s how it could be done:
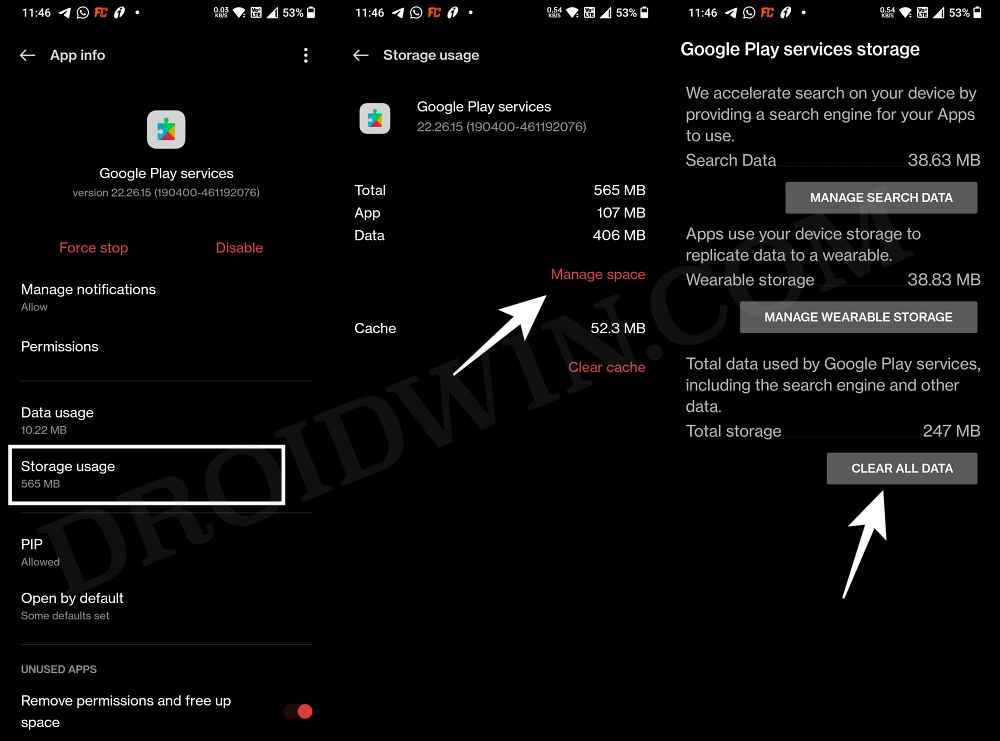
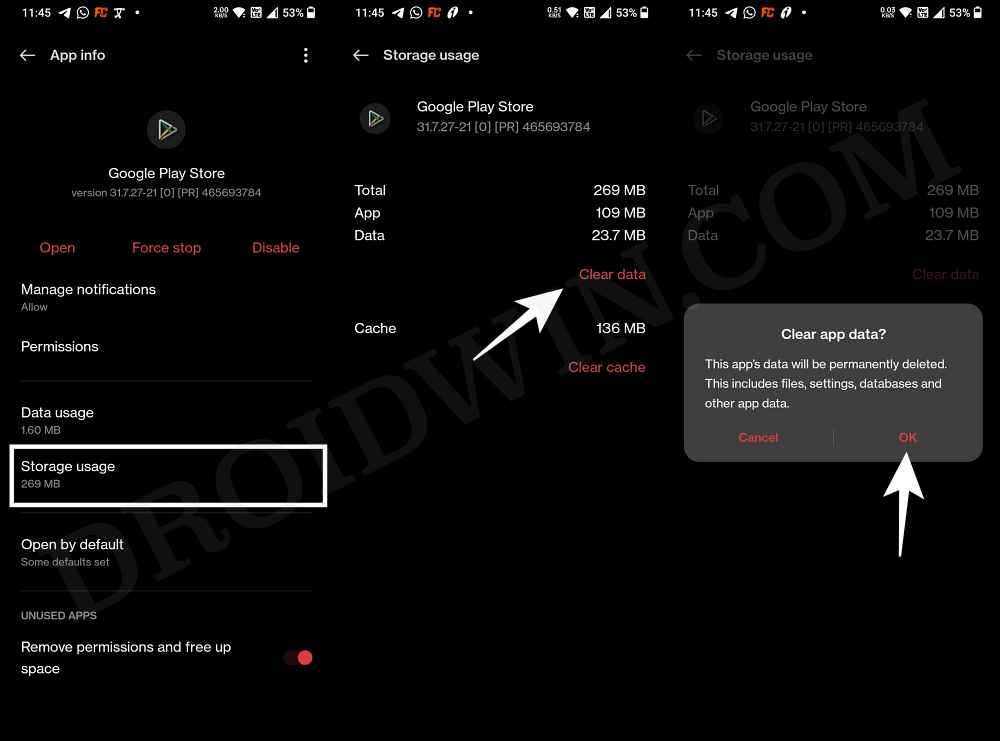
STEP 8: Delete Play Service and Play Store Data
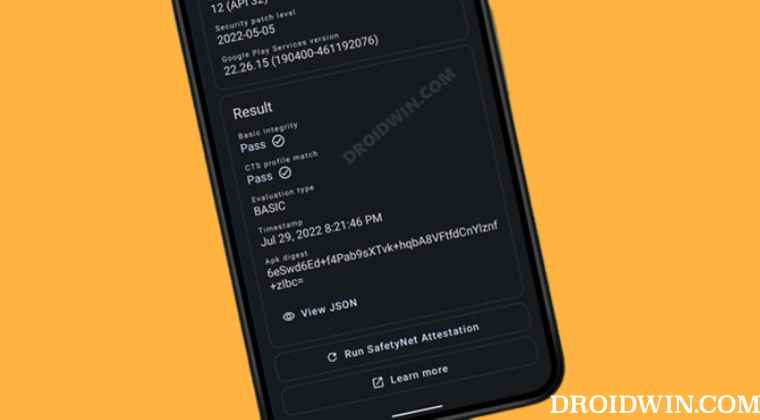
STEP 9: Check SafetyNet Result on Rooted OnePlus 11
So with this, you have successfully passed the SafetyNet on your rooted OnePlus 11. If you have any queries concerning the aforementioned steps, do let us know in the comments. We will get back to you with a solution at the earliest.
About Chief Editor