While most of it is in the beta stage, it is still a piece of great news nevertheless. With that said, not every device gets these OTA updates at one go. The rollout takes place in batches, meaning it will first be welcomed by a particular section of users, then to the next set, and so on. Furthermore, the update is also based on the regions. USA and South Korea are mostly among the earliest adopters of these updates, followed by Asian countries. All in all, the OTA update usually takes some time. But what if we told you that you could cut down this wait time? Yes, that is very much possible. You could directly download the Android 11 (OneUI 3.0) firmware for your Samsung device and then install it right away via Odin. And in this guide, we will help you with just that. This guide encompasses all the instructions- right from how to download the latest Android 11 OneUI 3.0 update for your Samsung device to its installation steps via the Odin Tool. Follow along for the detailed instruction set.
How to Root any Samsung device via Magisk and OdinSteps to Flash magisk_patched.tar (patched Samsung AP file) via OdinHow to Boot Rooted Samsung to Recovery Mode and Rooted OSHow to Unlock Bootloader on any Samsung Device [New VaultKeeper Method]
What’s New in OneUI 3.0 based on Android 11
There are quite a few new and noteworthy features in the latest iteration of Samsung’s customized Android OS skin. For example, you could now configure the sensitivity of the back button, view the current refresh rate, or even use Bluetooth Headphones in the Airplane mode. Along with that, using the Resume on Reboot feature, apps can start functioning normally after a reboot, without the need of the users to unlock their device. Likewise, you can send images from the notification replies.
Then with the introduction of three new biometric categories (strong, weak, and device credentials) further strengthens the device security. Apart from all these, you will be welcoming a plethora of Android 11 features as well. These include a new conversation section in the notification section, a new one-time permission set, the ability to schedule dark mode, and a plethora of other functionalities. And now you could bring all these features to your Samsung device as well. Given below are the steps to install Android 11 (OneUI 3.0) on your Samsung device via Odin.
How to Install Android 11 (OneUI 3.0) on any Samsung Device via Odin
We have listed the below instructions into separate steps for ease of understanding. Follow along.
STEP 1: Download Samsung Android 11 OneUI 3.0 Firmware
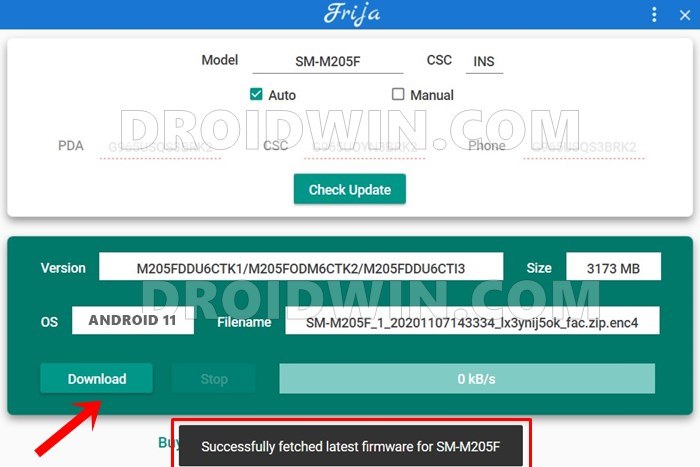
To begin with, you will have to download your Samsung device’s OneUI 3.0 firmware based on the latest Android 11. For that, there exists a plethora of tools and websites, however, in our testing, Frija is the standout among the crowds. With that said, you may now refer to our detailed guide on How to Download Samsung Stock Firmware/ROM via Frija Tool. Save a click and check out the shorter version: Download the Frija tool, get hold of your device Model Number and CSC Number (from the About Phone section), input it in Frija, and hit the Download button. That’s it.
How to Pass Magisk SafetyNet on Rooted Android 11Root Android 11 via Magisk Patched boot.img (without TWRP)Fix Magisk patched boot.img issue while Rooting Android 11Disable DM-Verity or Android Verified Boot without TWRP
STEP 2: Extract the Samsung Stock Firmware
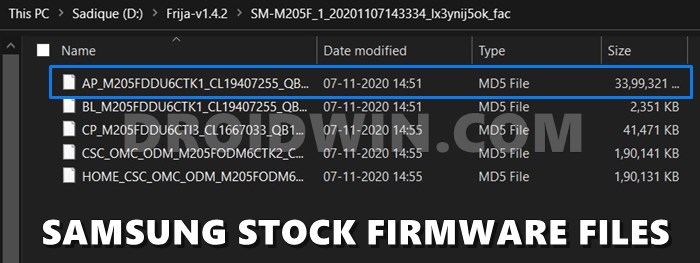
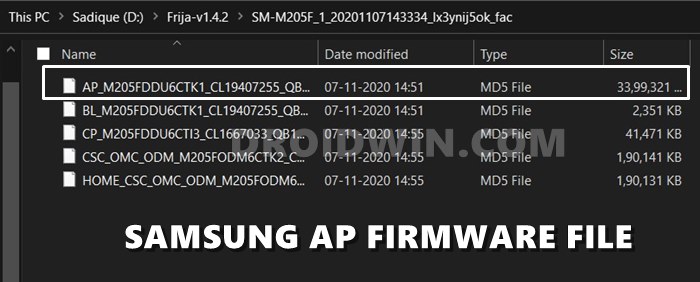
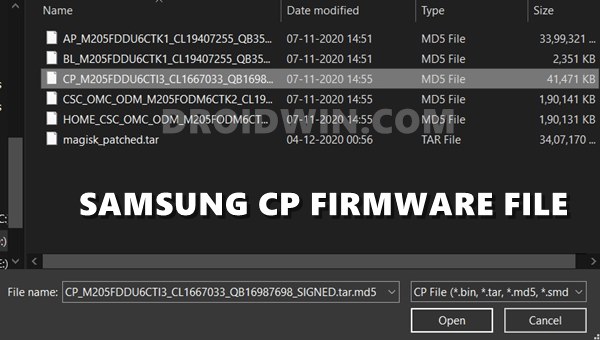
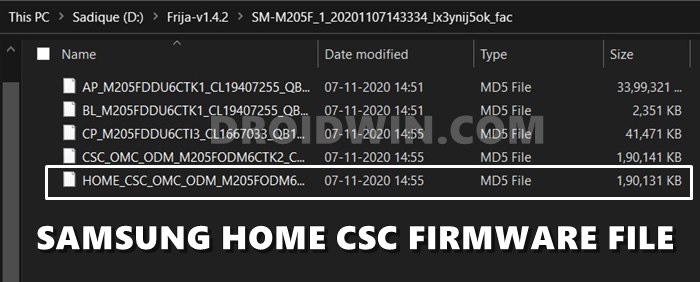
Once you have downloaded the firmware, extract it using any extraction software (WinZip, WinRAR, 7ZIP, etc). Upon extracting it, you should get the following files: AP, BL, CP, CSC, and HOME_CSC. All these files will be in .tar.md5 format.
STEP 3: Boot Samsung device to Download Mode
Once you have the required firmware, it’s time to boot your device to Download Mode. This is needed so that the Odin Tool recognizes your Samsung device which in turn will allow you to install Android 11 (OneUI 3.0). So how to boot to this mode? Well, different devices follow different approaches for the same. In this regard, we have written a detailed guide on How to Boot any Samsung Device to Download Mode, you should refer to it. Save a click and check out the shorter version: Most newer devices require you to power it off -> Press Volume Up and Volume Down keys -> Release the keys on Bootloader Screen -> Then hit the Volume Up key to enter Download Mode.
Detailed Steps to Fix adb is not recognized ErrorFix: pip is not recognized as an internal or external commandHow to Fix Unauthorized Device with ADB Commands [3 methods]How to Fix Error: Cannot load recovery.img
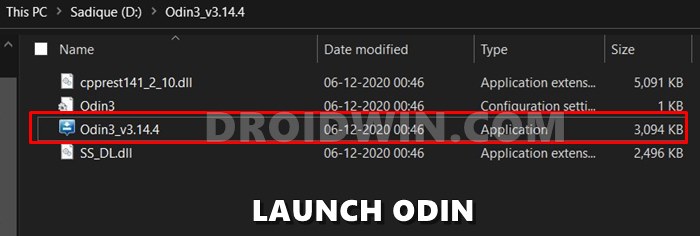
STEP 4: Install Android 11 OneUI 3.0 on your Samsung via Odin
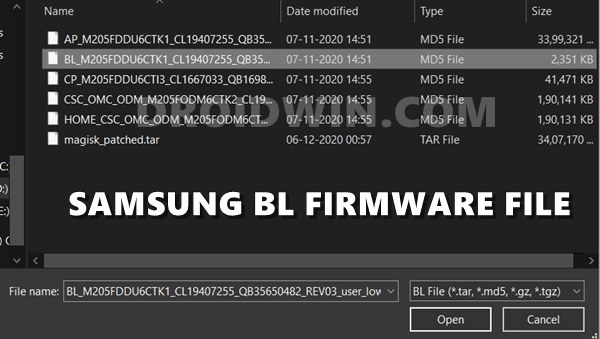
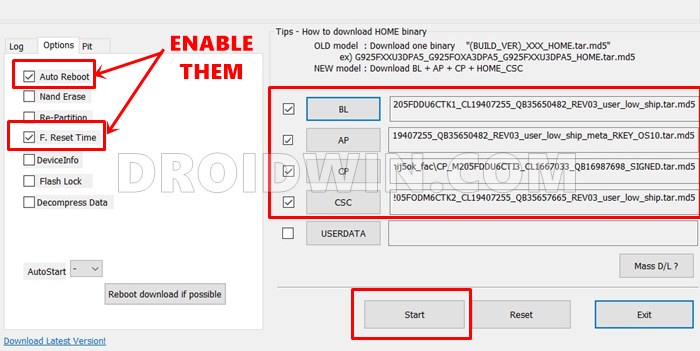
It’s now time to load all firmware files to the Odin tool and then subsequently install it onto your Samsung device. Follow along: That’s it. Your device will now boot to the newly installed OS version. On that note, we conclude the guide on how to install Android 11 (OneUI 3.0) on your Samsung device via Odin. If you have any queries, do let us know in the comments section below. We will get back to you with a solution at the earliest.
Fix TWRP Error 7 (While Flashing Custom ROM via TWRP)How to Fix FAILED (remote: unknown command) ErrorHow to Permanently Install TWRP without TWRP ZIP File (only using TWRP.img file)Root Android Devices Without TWRP Recovery
About Chief Editor