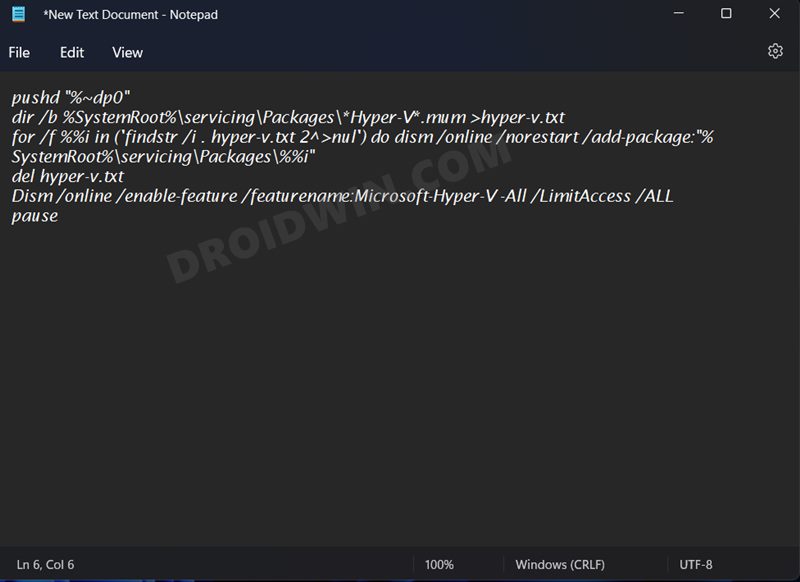
Well, since Hyper-V is baked into the system, it gives you a much more optimized and efficient platform to test out the guest OS. Regarding which, you could run Windows, Ubuntu, and a bunch of other Linux distros in its ecosystem. However, by default, Hyper-V is only available for the Pro, Education, and Enterprise edition of Windows and isn’t included in the Home edition of Windows. But fret not. In this guide, we will show you a nifty method to install and enable Hyper-V on the Windows 11 Home edition as well. So without any further ado, let’s get started.
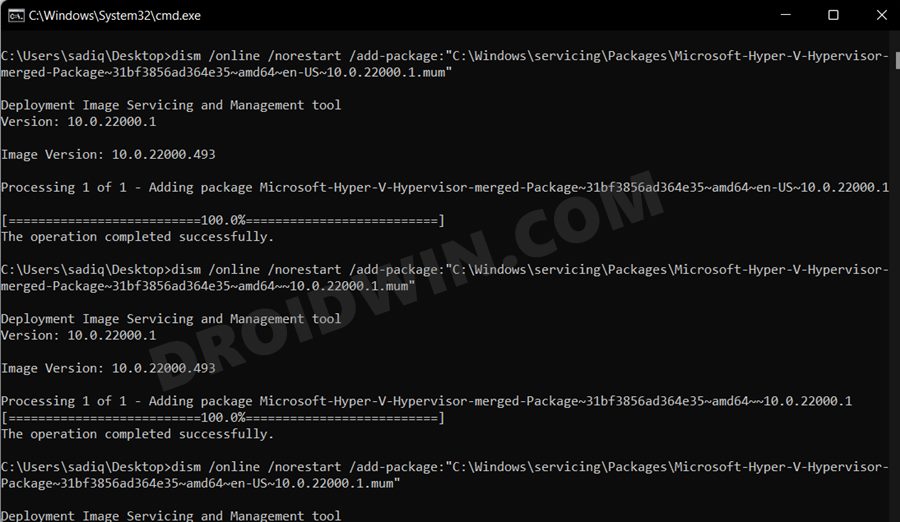
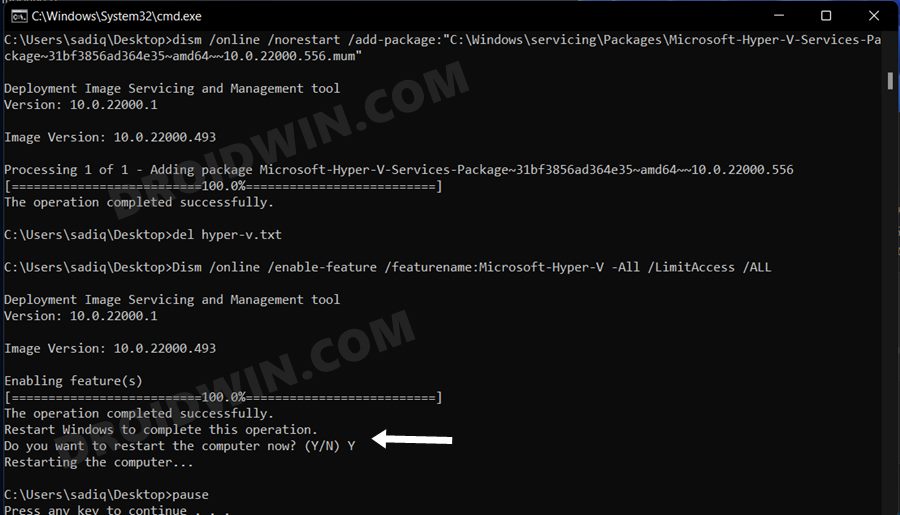
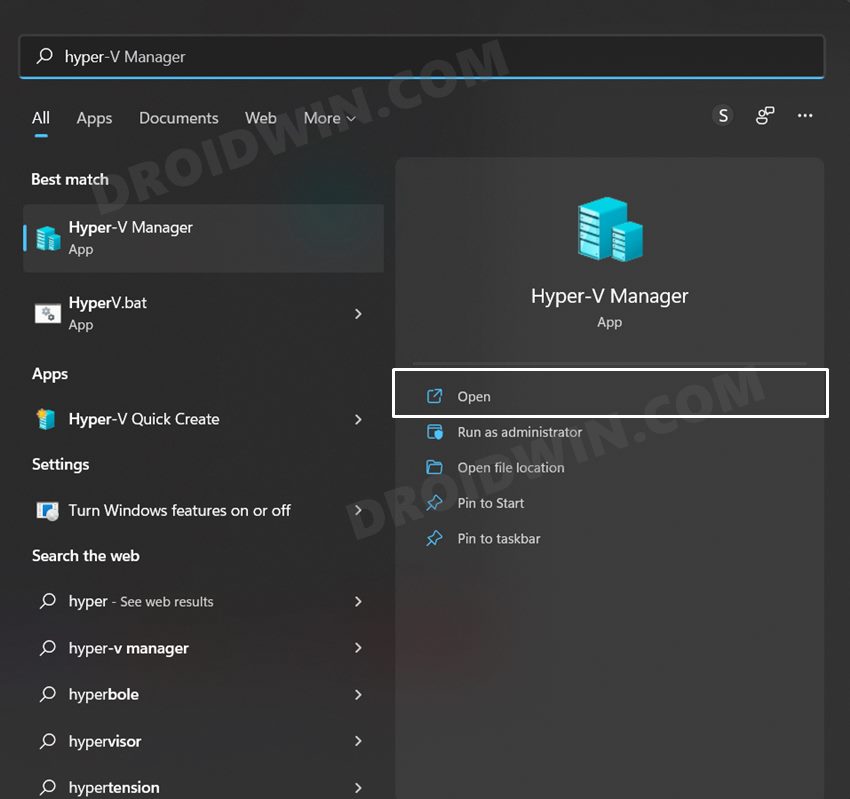
How to Install Hyper-V in Windows 11
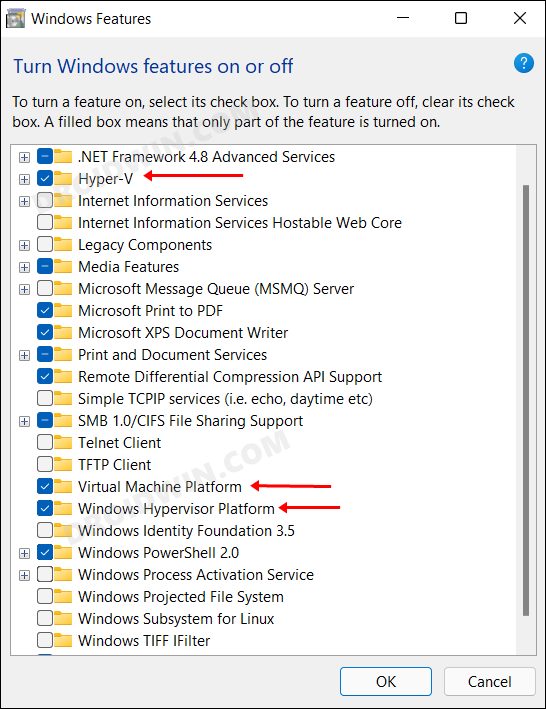
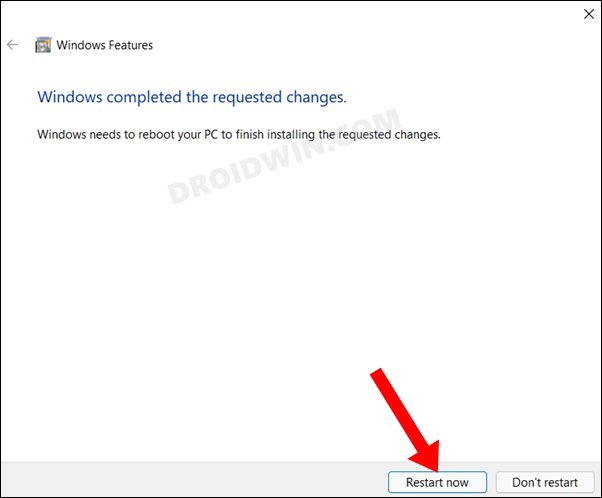
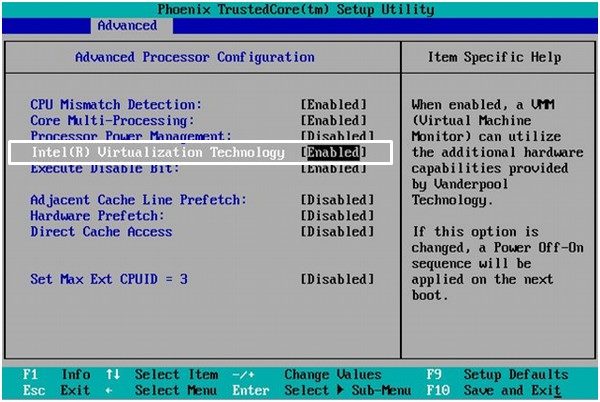
How to Enable Hyper-V in Windows 11
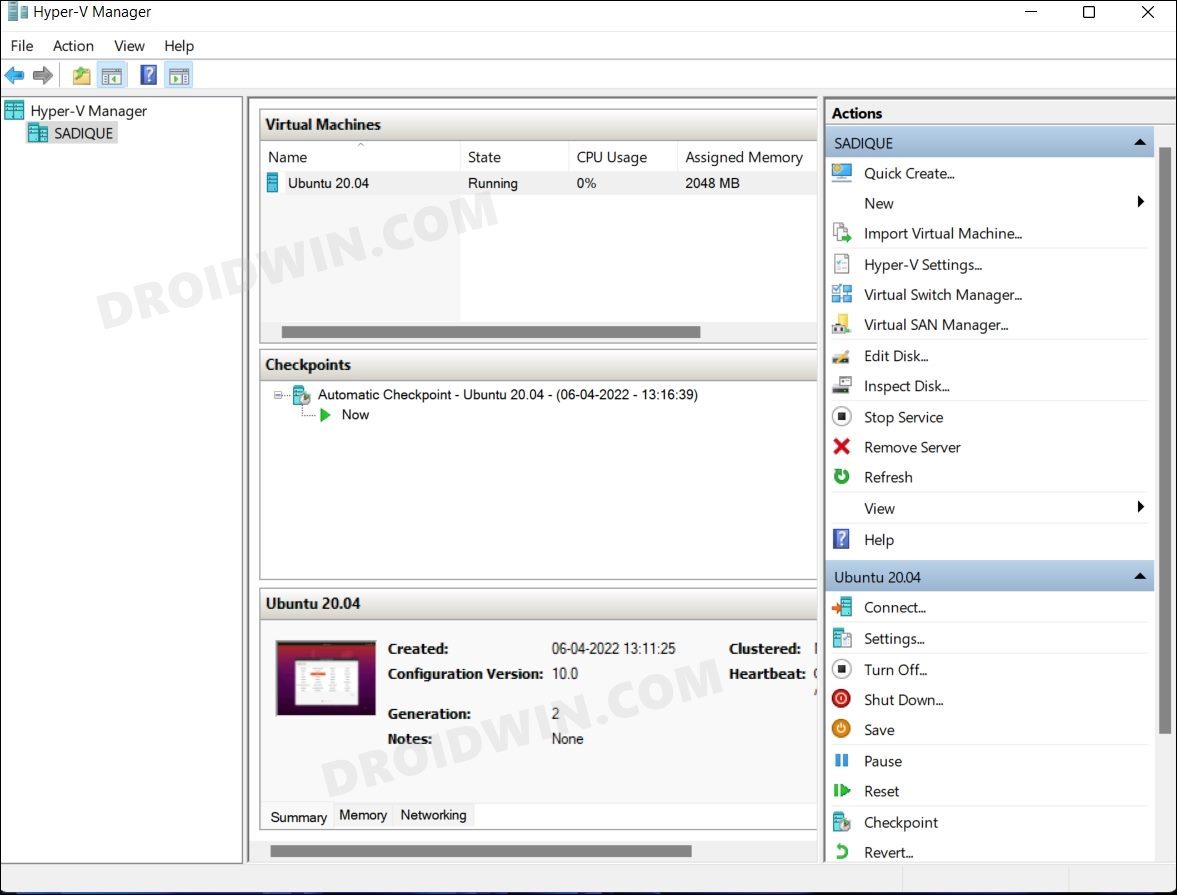
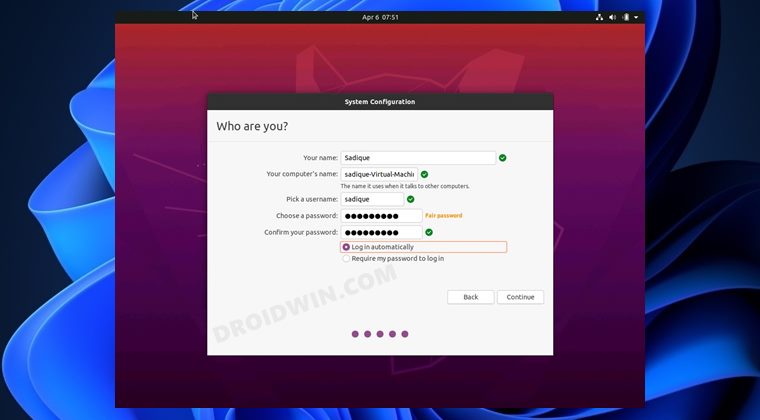
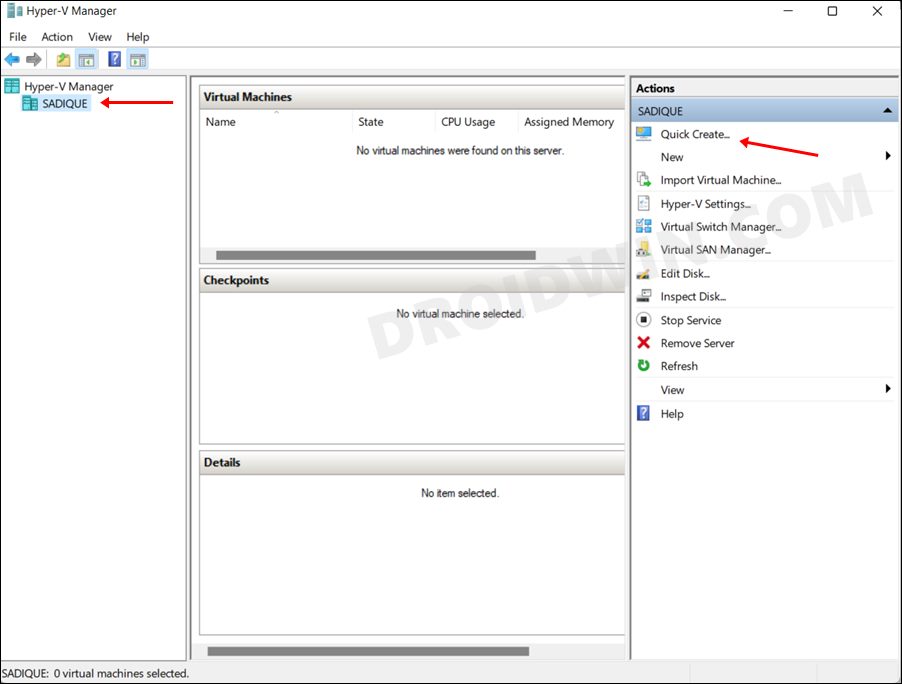
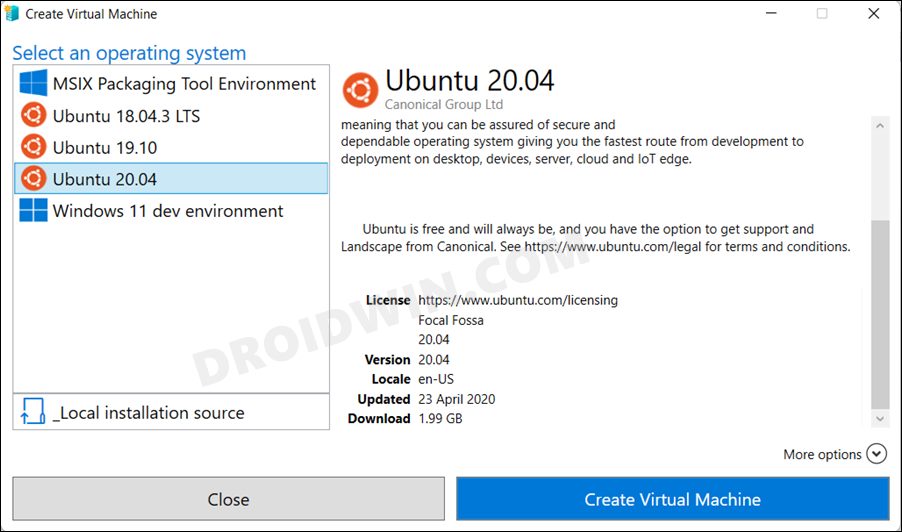
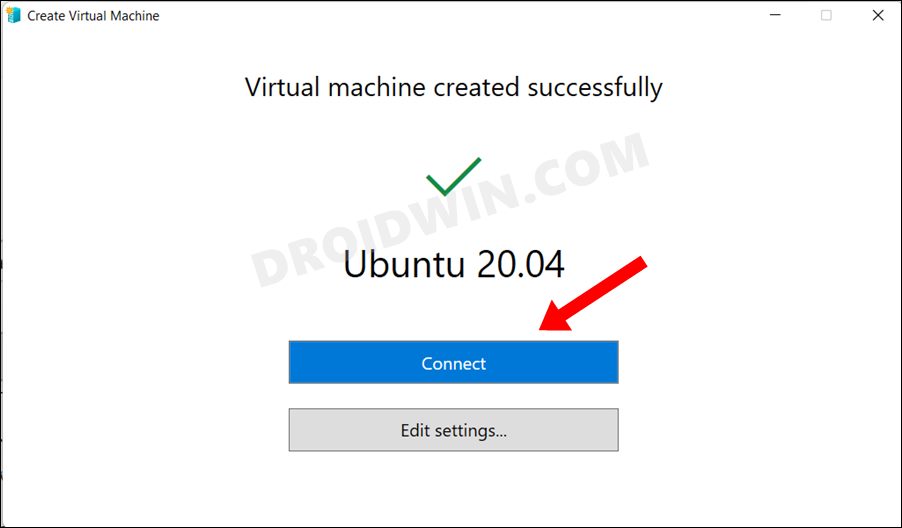
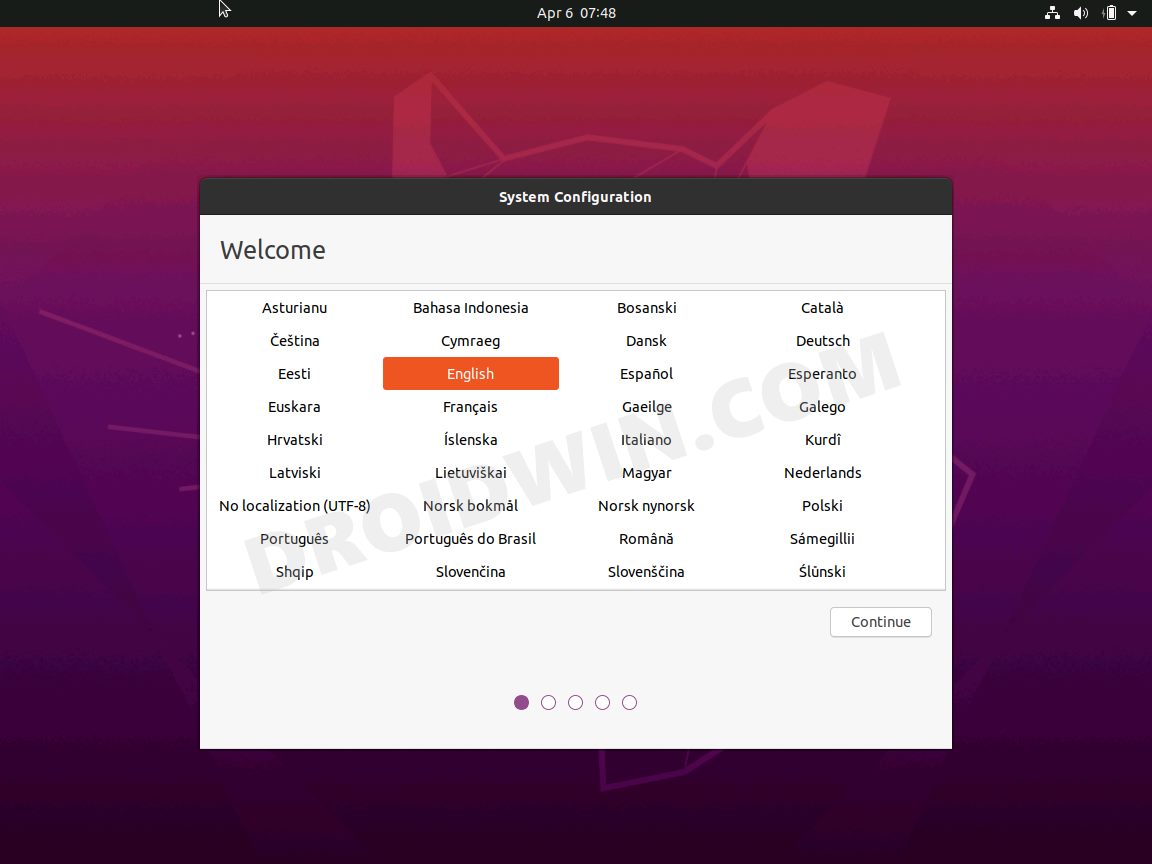
How to Create Virtual Machine using Hyper-V in Windows 11
That’s it. These were the steps to install and enable Hyper-V in Windows 11. Likewise, we have also listed the steps to create a virtual machine using it. If you have any queries concerning the aforementioned steps, do let us know in the comments. We will get back to you with a solution at the earliest.
How to Install macOS on Windows and Run Mac AppsGuide to Install Windows 11 on any PC using a Virtual MachineHow To Find Windows Version, Build, And Edition From ISO FileHow to Install Chrome OS Flex in Virtual Machine
About Chief Editor