UPDATE 1: We have added a new method: Extract Payload.Bin directly on your Android device without using a PC. So whereas the first method requires a PC, the second method doesn’t. You may refer to any of those two methods that meet your requirements. In this tutorial, we will show you how to extract the payload.bin file so that you may get the stock boot image (boot.img) and other firmware files. Earlier, the OEMs used to provide all the stock firmware files inside a single zip file. All you had to do is just extract that stock firmware ZIP and all the necessary files will be right in front of you. While some OEMs still follow this rule, others like the OnePlus don’t. And this is where it might issue trouble for quite a lot of users. Don’t Miss: How to Extract OZIP Realme Stock ROM (Firmware) The thing is all the important stock firmware files are now bundled inside the payload.bin file. This file cannot be simply extracted using WinZip or WinRAR, etc. They require a specific set of applications in the form of the Payload Dumper Tool and Python. But simply installing both of these tools wouldn’t do any good. There are quite a few steps involved if you wish to extract the contents of the payload.bin file. And in this regard, this guide will come in handy. Today, we will show you how to extract the payload.bin and get the stock boot image and other important partition files. But before we do so, it is also important to understand why you might need to carry out the aforementioned task. In the below section, we will first discuss the need (importance) to (of) extract this payload.bin file. After which the steps to get hold of the stock boot.img file via Payload Dumper and Python will be mentioned. Follow along.
How to Install OTA Updates in Rooted Android DeviceHow to Permanently Install TWRP without TWRP ZIP File (only using TWRP.img file)Root Android Devices Without TWRP Recovery[GUIDE] Flash ROMs/Magisk/TWRP/Kernels on A/B Partition Devices
The Need to Extract payload.bin File using PC
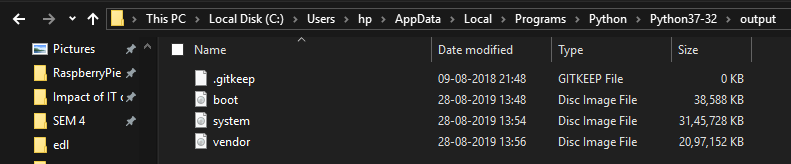
To begin with, Payload.bin holds three of the most important partition files- system.img, boot.img, and vendor.img. After coming back from a GSI to stock ROM, you might need to flash the system.img file (Read: How to Go Back to Stock ROM from GSI ROM). Vendor image, on the other hand, contains device-specific hardware drivers. But it is the boot.img file that might be of interest to a lot of users out there. You see, with an open-source ecosystem like Android, there are a plethora of customizations to try out. Right at the top is the ability o gain administrative-level privileges in the form of the root. And to root your device, there exist two different methods: using TWRP and without TWRP. As of now, many users prefer to go with the latter method. This is because there is no working TWRP Recovery for a lot of Android devices. Hence if you wish to root without TWRP, the first prerequisite is to get your hands on the device’s stock boot.img file. Once that is done, you could easily patch it via Magisk and then flash it via fastboot commands. However, as mentioned before, OEM now compiles all these files (including boot.img) inside the payload.bin file. So to root your device, you will anyways have to extract the payload.bin file. In this regard, the best way out is using the Payload Dumper Tool and Python installed on your PC. Here are the complete instructions set to extract payload.bin and get the stock boot image file.
METHOD 1: Extract payload.bin File via Payload Dumper
Please go through the requirements section and make sure to download all the necessary tools. Once that is done, you may proceed with the steps. We have broken down the instruction steps into separate sections for ease of understanding.
Prerequisites
To begin with, you will need the payload.bin file. You could get it from the stock firmware for your device. Many OEMs upload the same on their official pages, such as the OnePlus Download and Update page or Google Factory Image page. So just download the firmware, extract it via WinZIP, WinRAR or 7ZIP and get hold of the payload.bin file. Now, for extracting the Payload.bin file, you need a Payload Dumper Tool. We would like to thank Gregory Montoir for creating this tool. You could download it from the following link: payload_dumper.zipLikewise, you should also have to install Python on your PC. Download Python v3.8.5 (latest version at the time of writing).[GUIDE] Flash ROMs/Magisk/TWRP/Kernels on A/B Partition DevicesEverything About Magisk- Manager, Modules, and MoreBest Magisk Modules of 2020 [PART-1]How to Fix FAILED (remote: unknown command) Error
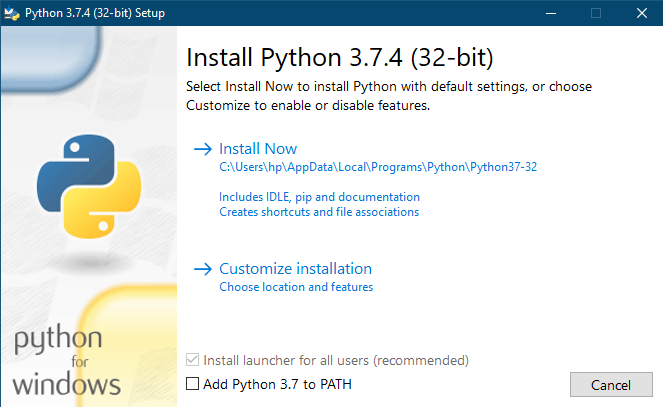
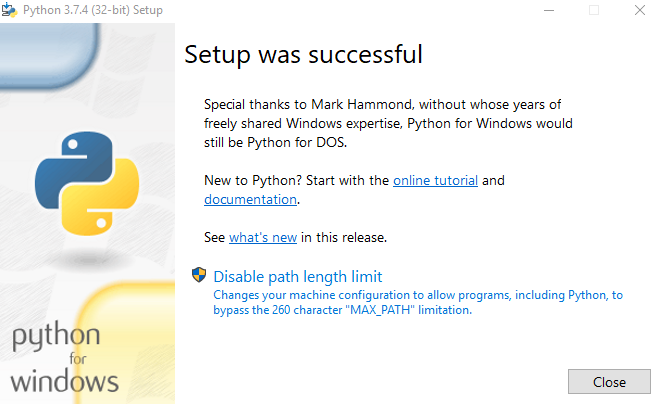
STEP 1: Install Python on your PC
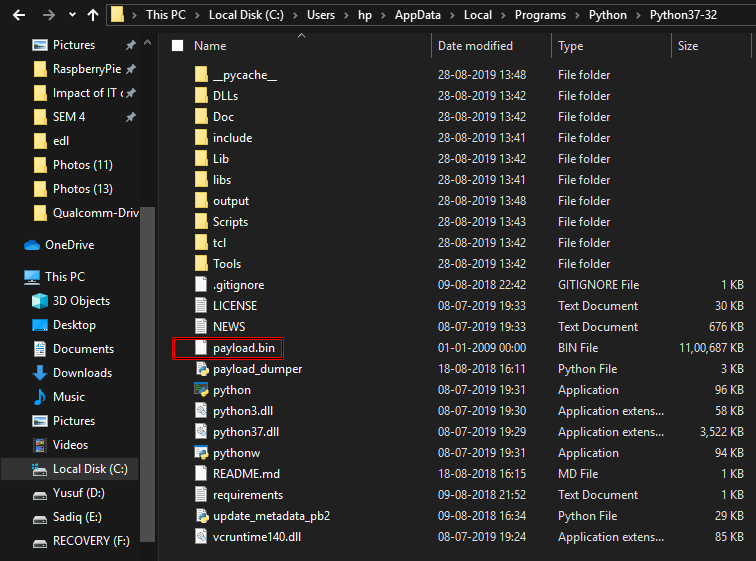
STEP 2: Install Payload Dumper file
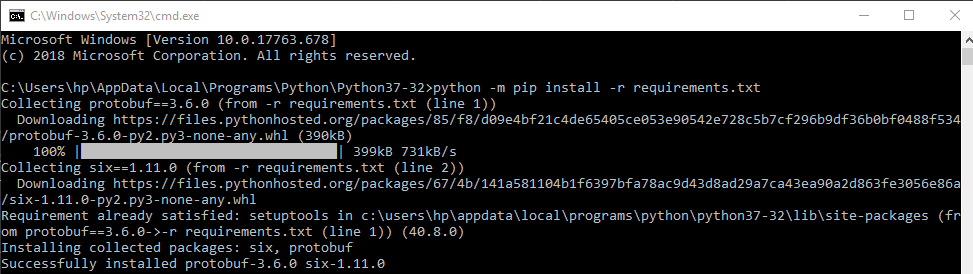
Now that you have installed Python, you could proceed with the extraction of the Payload.bin file and then get the stock boot image file. For that, we will be making use of the Payload Dumper Tool. Follow the below steps for that:
STEP 3: Extract Payload.Bin
So these were the steps to extract the payload.bin file and get the stock boot.img. Let’s now check out how this could be done directly on your Android device, without using a PC.
METHOD 2: Extract Payload.bin Directly on Android Without PC
The below instructions are listed under separate sections for ease of understanding. Make sure to follow in the exact same sequence as mentioned. Droidwin and its members wouldn’t be held responsible in case of a thermonuclear war, your alarm doesn’t wake you up, or if anything happens to your device and data by performing the below steps.
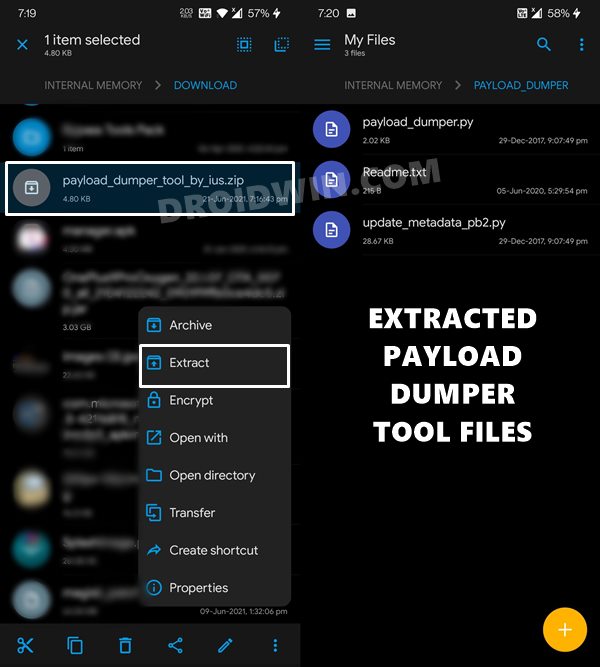
STEP 1: Setup Payload Dumper Tool
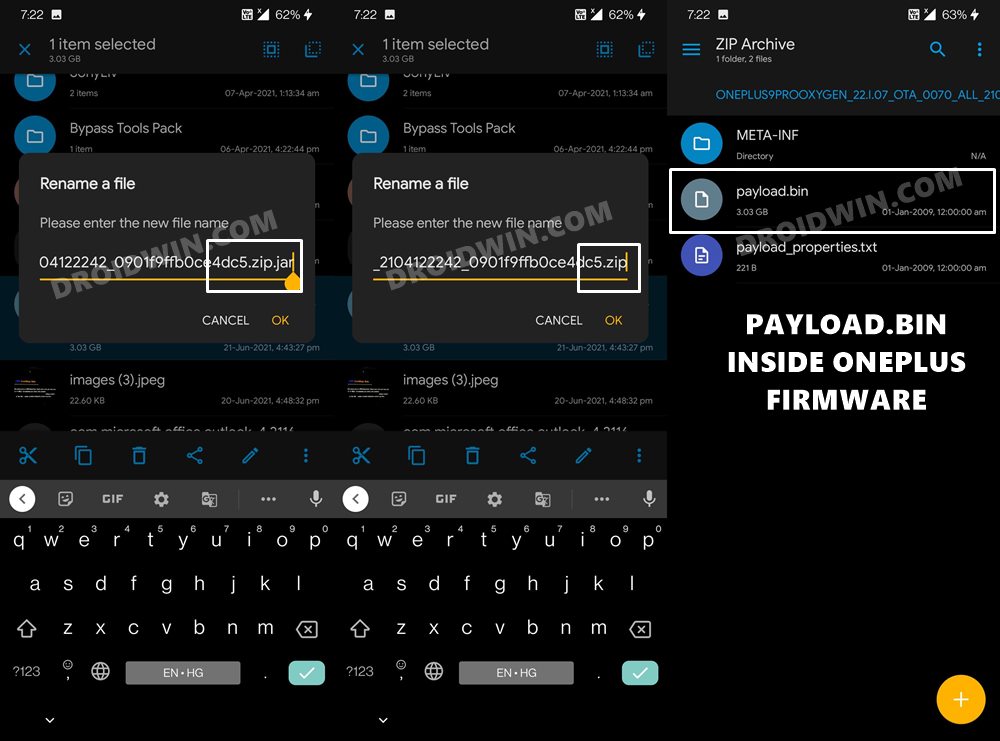
STEP 2: Get the Payload.Bin File
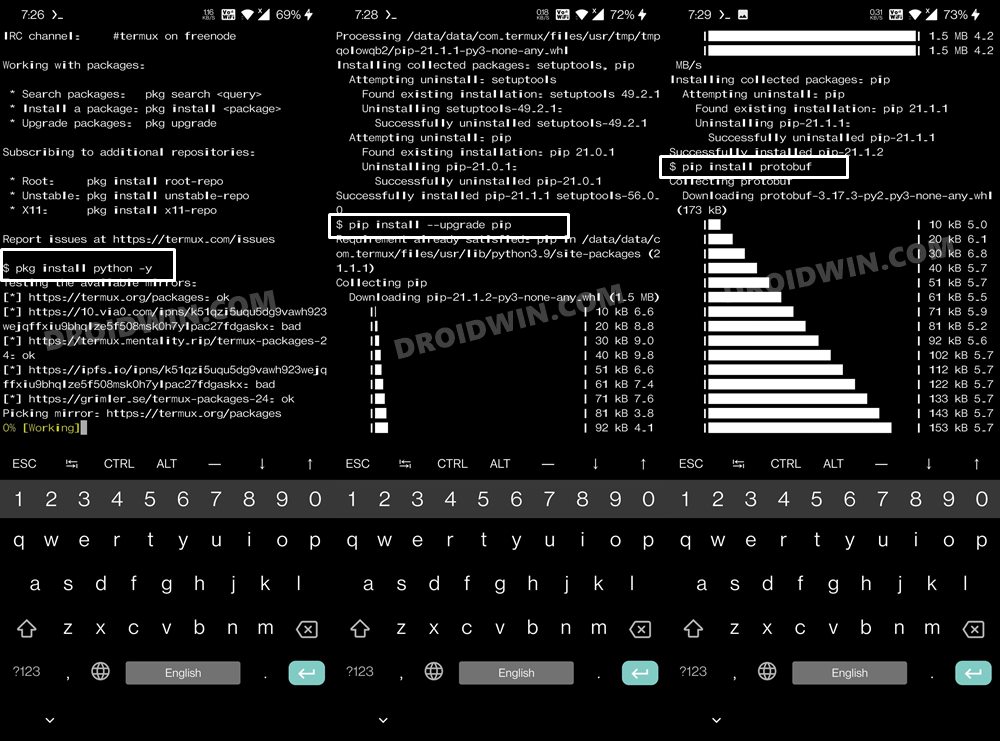
STEP 3: Setup Python on Android
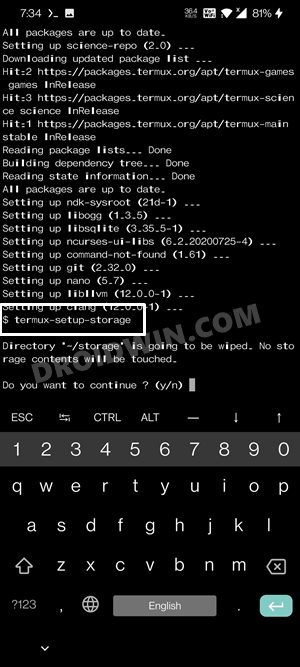
STEP 4: Grant Storage Permission
After this, grant the storage permission to Termux via the below command. You might get a warning from termux that “storage partition is going to be wiped but no storage contents will be touched”. You need to type in Y and hit Enter. Don’t worry, you wouldn’t lose any data. I have personally tried it on my device as well and there was no data loss.
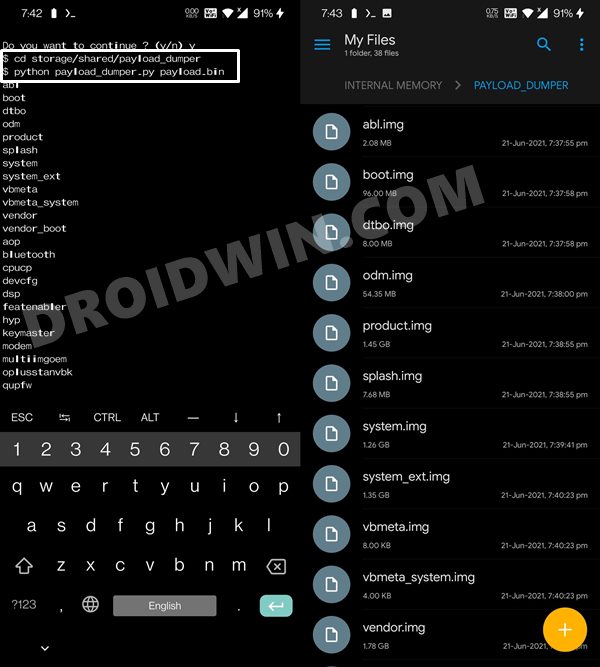
STEP 5: Change Termux Directory to Payload.Bin File
You will now have to change the Termux’s directory to the folder where you have placed the payload.bin file. In our case, that is the Internal Storage’s payload_dumper folder (this folder you would have got after extracting the Payload Dumper Tool). Anyways, the command to change the directory is:
STEP 6: Extract payload.bin on Android
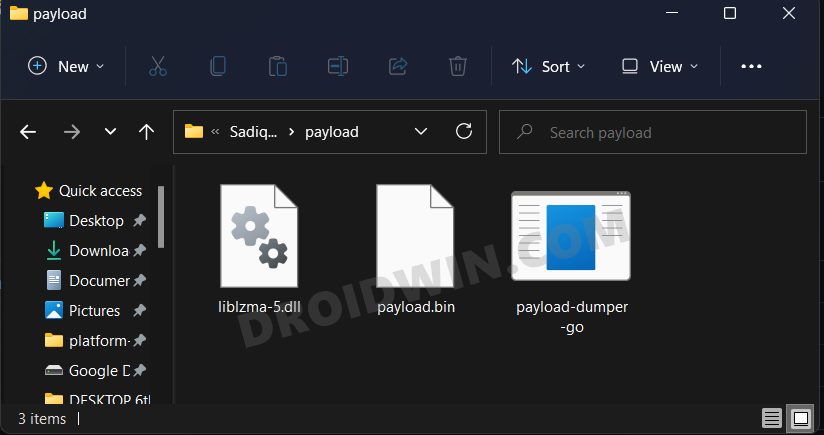
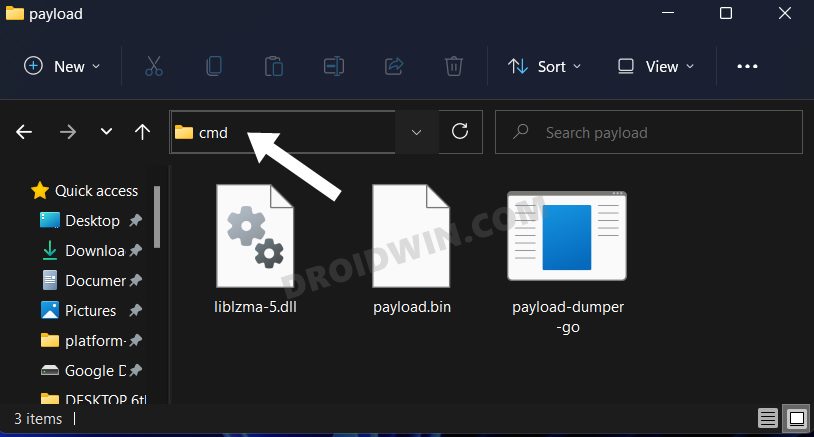
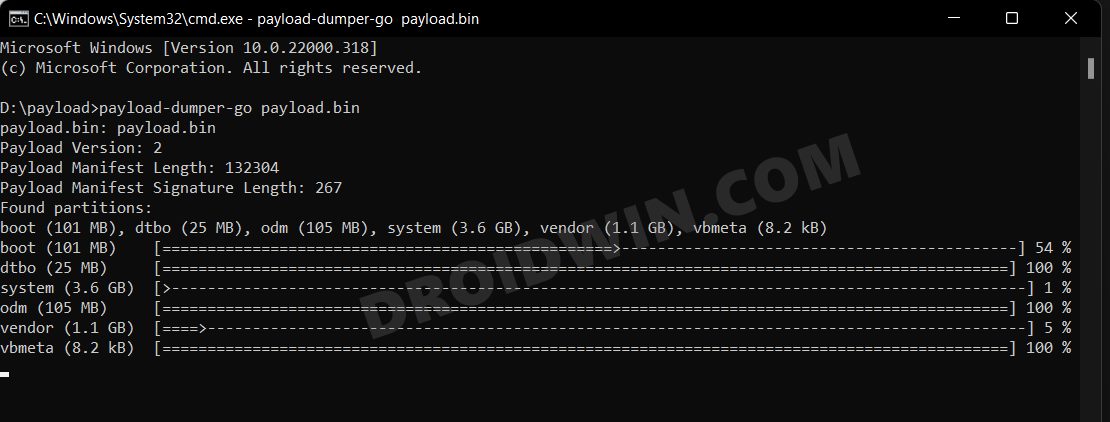
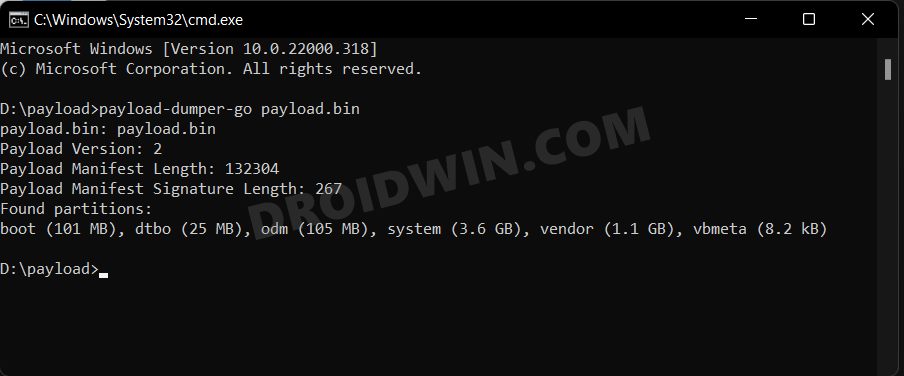
METHOD 3: Extract Payload.bin via Payload Dumper Go
That is it. With this, you have successfully extracted the payload.bin file and got the stock boot image file via the Payload dumper tool and Python. Along the same lines, we have also shared the steps to do via the Payload Go Tool which as of now, seems to be the best method for this job. Apart from that, we have also listed out the steps to do so directly on your device without using a PC. You could transfer the stock boot.img file over to your device and then refer to our instructions to patch it via magisk and then flash it via fastboot. If you have any queries related to any of the two aforementioned steps, do let us know in the comments section below.
About Chief Editor
![]()